Quick Search:
User Case: How Do I Move Files from Box to SharePoint
“So, we have a large project coming up and I’m looking for any suggestions on products that I could use to do a cloud-to-cloud migration from Box to SharePoint. Would also be nice if it supported other migration scenarios like Dropbox, etc. Would also be nice if the product would also support email migrations to MS365.” – A Question from Reddit.
Why Transfer Box to SharePoint?
Box is an excellent and popular cloud storage and collaboration service. Equipped with collaboration features, Box is such a strong competitor for SharePoint. However, as an intelligent and professional online collaboration solution, SharePoint still stands out since it offers intranet capabilities, including directory creation, discussion board hosting, event listing, and more.
Specifically speaking, there are many advantages to move Box files to SharePoint. For instance, SharePoint offers Customizable Sites and Workflows, which means it allows users to create team sites and establish workflows based on their own needs. It’s also a practical platform to post company news and events for fellow employees. Whereas Box is less flexible and more complicated.
So, how can you transfer files from Box to SharePoint and manage them easier? We will show you the detailed steps in the following content. The one is a manual way, and the other is a quick solution.
How to Transfer Box to SharePoint via Downloading
You can move Box data to SharePoint by downloading and uploading. In detail, you can download the data from Box on your local device and then upload what you’ve downloaded to SharePoint Online. In this way, the data can be migrated successfully. Here’s what you should do:
Step 1: Log in to your Box on the web, and locate the data you intend to move.
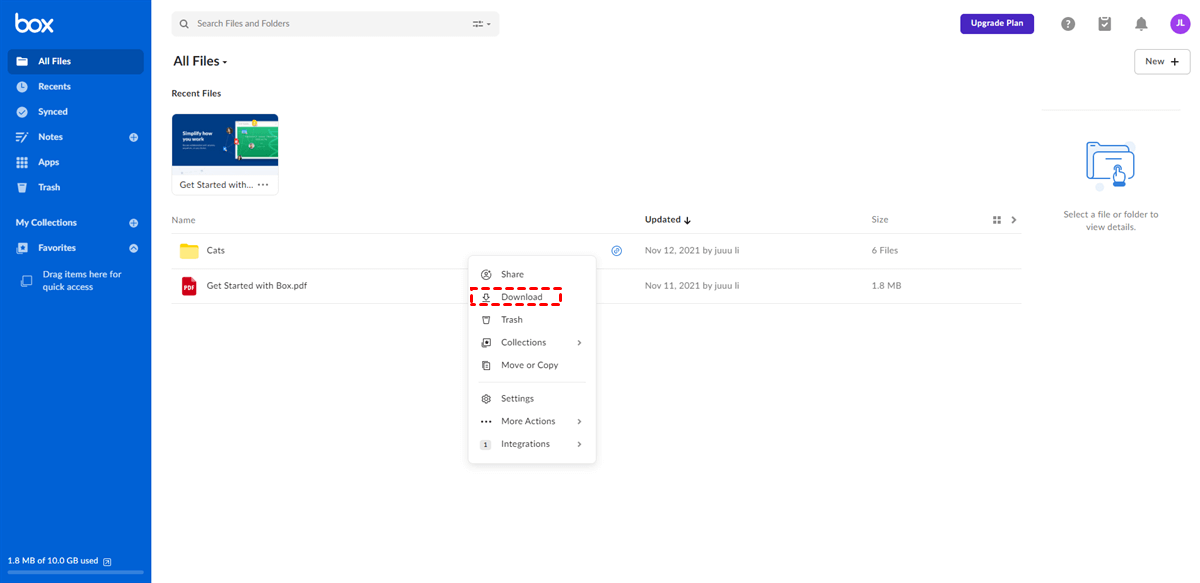
Step 2: Right-click the file/folder you want to migrate and select the Download button. Then the selected data can be downloaded on your local computer.
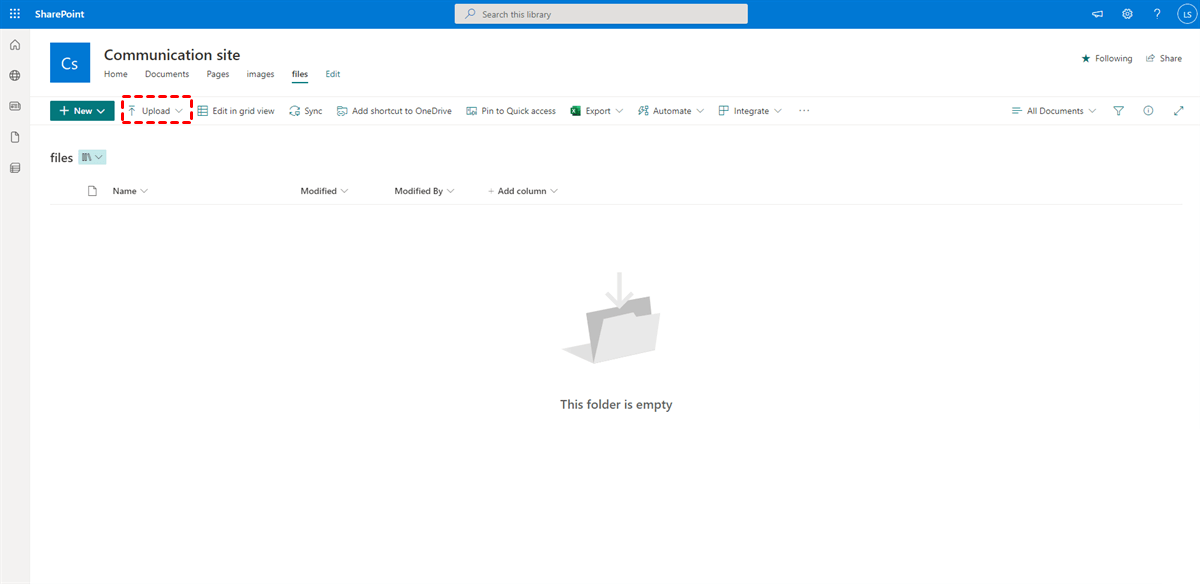
Step 3: Turn to your SharePoint, and head to the site where you want to save the downloaded data. Then upload the data to SharePoint. Or, you can drag and drop the data to SharePoint as well.
The method is recommended when you have a few files to migrate. If you have lots of files, it will cost much time. Meanwhile, it is important to keep the internet connection stable. Or, the download-and-upload process will be stuck.
How to Transfer Box to SharePoint without Downloading
To ease your burden and improve efficiency, it is more convenient to utilize a specialized cloud transfer tool – MultCloud. This service allows users to manage multiple cloud services and make data migration between each other in a hassle-free way. There are some virtues to migrate data across cloud drives via MultCloud.
- More than 30 Clouds Supported. MultCloud supports over 30 major and popular cloud drives in the market, including Google Drive, Google Photos, OneDrive, Dropbox, SharePoint, Wasabi, Flickr, MEGA, SugarSync, Amazon S3, etc. Meanwhile, it doesn’t limit how many clouds/accounts you can add. So, you can add all clouds you use and manage them in only one place.
- The Fastest Transfer Speed in the Industry. Compared to other competitors, MultCloud offers a leading transmission speed when users move data from one cloud to another. This is practical when users have a large number of files to move, since MultCloud can accomplish the transfer task in the quickest way.
- Customized Transfer. Users can make transfer tasks based on their own requirements. For example, users can make complete and partial transfer tasks between cloud services.
- Transfer Data in the Background. MultCloud doesn’t rely on the internet connection to migrate files from cloud to cloud. Instead, it depends on data traffic and MultCloud offers 5GB of free data traffic to users each month.
Now, read the following part to learn how to transfer Box to SharePoint via MultCloud.
Step 1: Create a MultCloud by your email and sign in. Or, you can sign in with your Google account directly.
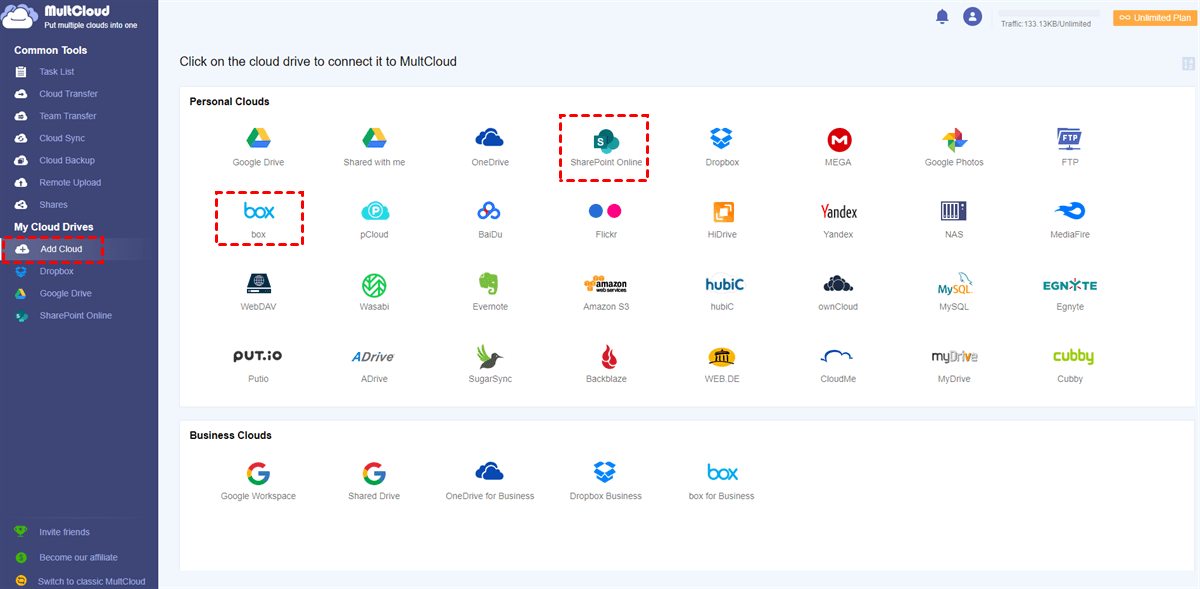
Step 2: Head to Add Cloud under My Cloud Drives, and add Box and SharePoint Online, respectively, by tapping on their icon and following the instructions shown to you.
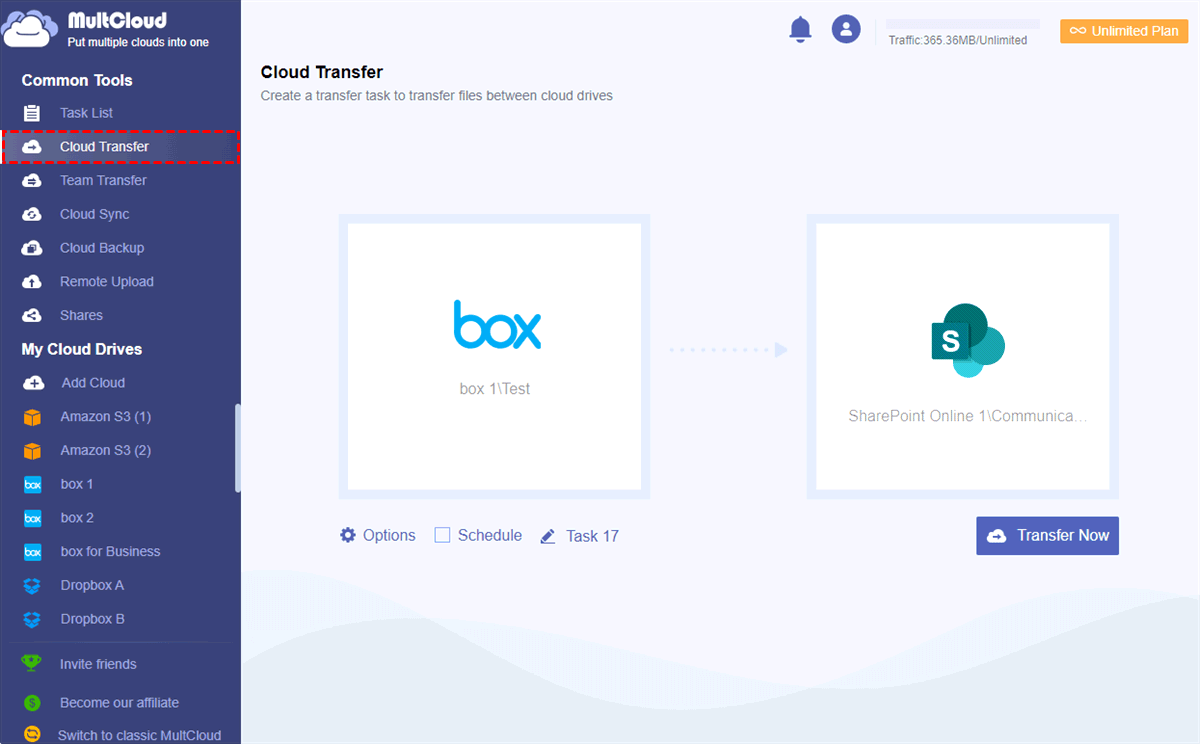
Step 3: Click on the Cloud Transfer tab under Common Tools, press the first box to select Box, and tap on the right box to select SharePoint Online. Next, you can Transfer Now to begin the task.
Warm Tip: Since MultCloud has limited access to SharePoint, we choose Documentary on SharePoint as the target directory.
By performing these 3 steps, you can transfer files from Box to SharePoint Online effortlessly. Similarly, if you want to transfer S3 bucket to another account, you can also take advantage of this feature. All you need to change is the original and target directories.
In addition, MultCloud has other excellent features as well. As mentioned before, it provides you with a place where you manage different cloud drives. So, you can go to different cloud drives with only one click, which avoids frequent account shifting. Also, the basic features that you can perform on the official website of each cloud can also be available on MultCloud.
For instance, you can rename a folder on SugarSync, move a document on Box, upload photos to Google Photos, download files from Dropbox, share Google Drive folder with non-Gmail users, etc.
In the End
After reading the whole content, you now know how to transfer Box to SharePoint via downloading. If you find the first method is troublesome, you can utilize MultCloud to move files between Box and SharePoint directly without downloading.
MultCloud Supports Clouds
-
Google Drive
-
Google Workspace
-
OneDrive
-
OneDrive for Business
-
SharePoint
-
Dropbox
-
Dropbox Business
-
MEGA
-
Google Photos
-
iCloud Photos
-
FTP
-
box
-
box for Business
-
pCloud
-
Baidu
-
Flickr
-
HiDrive
-
Yandex
-
NAS
-
WebDAV
-
MediaFire
-
iCloud Drive
-
WEB.DE
-
Evernote
-
Amazon S3
-
Wasabi
-
ownCloud
-
MySQL
-
Egnyte
-
Putio
-
ADrive
-
SugarSync
-
Backblaze
-
CloudMe
-
MyDrive
-
Cubby
