Quick Search:
User Case: Can Synology Sync to Cloud Drive Providers
Syncing a backup to a cloud provider
I'm using Synology's Drive Client to copy some files from a Mac Mini to my Synology NAS. What I'd like to do now is to then sync the files, on the NAS, to OneDrive. Is there a way to do this?
- Question from Reddit
Top 2 Ways for Synology Sync to Cloud
Have you ever wished you could access your important files from anywhere, anytime? Synology Sync to Cloud offers a convenient solution for backing up and synchronizing your data between your Synology NAS and cloud storage. In this article, we'll explore the two primary methods of achieving this: using MultCloud and Synology Cloud Sync.
1. Sync Synology to Cloud via Third Party [3 Steps]
MultCloud is a versatile cloud management platform that offers a variety of features, including file syncing, transfer, and backup. Its Cloud Sync feature provides a convenient way to synchronize files between your Synology NAS and various cloud storage providers.
- ✅Easy: Only 3 steps are required, easy to operate.
- ✅Custom: You can choose the appropriate synchronization mode according to your needs.
- ✅Fast: Updated content can be synchronized immediately.
- ✅Secure: 256-bit AES Encryption is provided throughout the process.
Step 1. Sign Up MultCloud
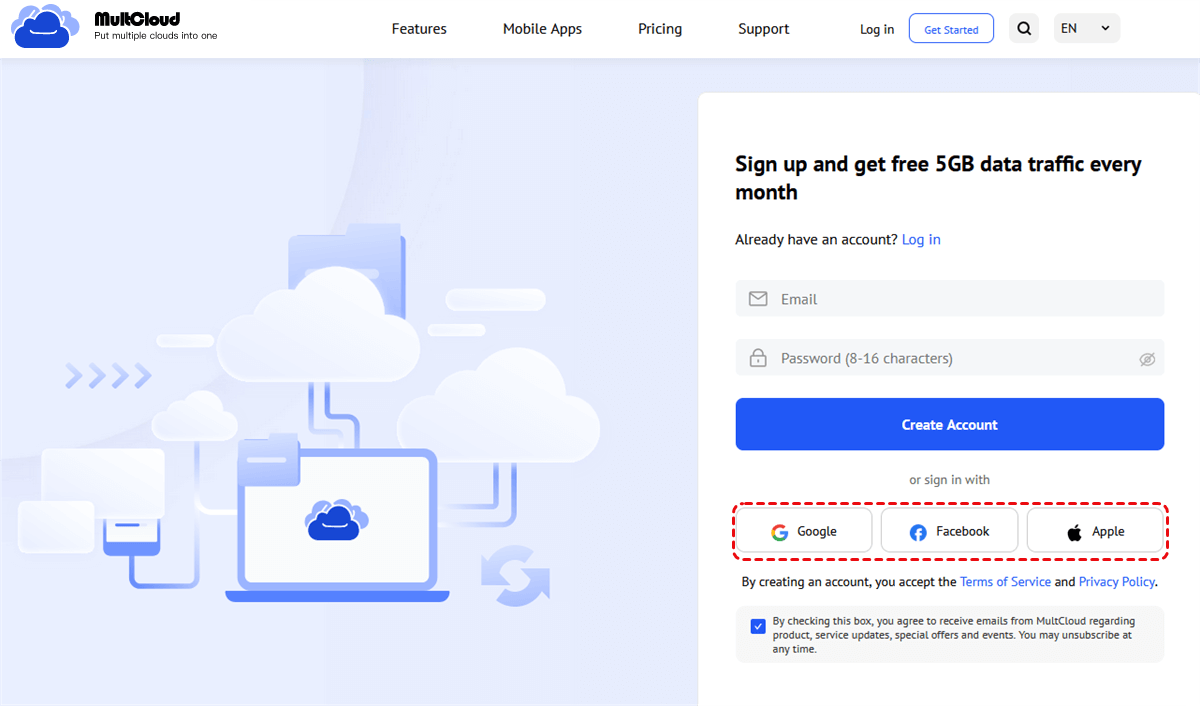
To set up MultCloud Cloud Sync, you’ll need to create a MultCloud account first.
Step 2. Add Synology NAS and Cloud Storage Accounts
Click "Add Cloud" and add your Synology NAS and cloud storage accounts one by one to the platform. Once your accounts are connected, you can configure the sync settings.
Step 3. Sync Files with MultCloud Cloud Sync
MultCloud Cloud Sync allows you to easily sync files and folders between your Synology NAS and cloud storage. Simply select the source and destination folders, choose the desired sync settings, and enable the sync task.
Notes:
- After enabling "Schedule", MultCloud will automatically keep your files in sync, ensuring that any changes made on one device are reflected on the other.
- MultCloud Cloud Sync offers a variety of customization options, allowing you to tailor the sync settings to your specific needs. You can choose to sync all files or only specific folders, select the sync frequency, and configure other settings as needed.
2. Using Synology Cloud Sync
Synology Cloud Sync is an app that allows you to sync your NAS files with various cloud storage providers. It operates in real-time, meaning any change you make on your NAS is immediately reflected in the cloud and vice versa. This makes it ideal for those who need continuous data synchronization between their NAS and cloud services.
Step 1: Install and Launch Synology Cloud Sync
Begin by installing Synology Cloud Sync on your device. Once the installation is complete, open the application.
Step 2: Select Your Cloud Provider
When you launch Synology Cloud Sync, you’ll see a list of available cloud providers. Choose the provider you wish to sync with, then click "Next".
Step 3: Configure Sync Settings
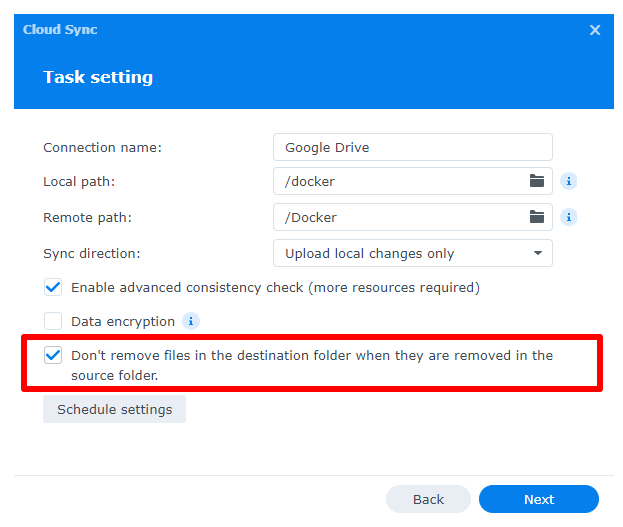
You will now be directed to the "Task Settings" page, where you can customize the following options for your sync task:
- Connection Name: Assign a name to this connection for easy identification.
- Local Path: Specify the location on your NAS device to be synced.
- Remote Path: Choose the location on the cloud server for syncing.
- Sync Direction: Determine the direction of the sync:
- Bidirectional: Syncs changes between both local and remote paths.
- Download Remote Changes Only: Syncs data from the cloud server to your NAS.
- Upload Local Changes Only: Syncs data from your NAS to the cloud server.
- Advanced Consistency Checks: Enable this to ensure file integrity by verifying hash, file size, and last modified time between both paths.
- Data Encryption: Choose to encrypt your files during sync. You’ll be prompted to create an encryption password, which will be required to access files from the cloud server. Files on your NAS will remain unencrypted.
- Schedule Settings: By default, syncs occur in real-time. You can use this option to set a specific sync schedule.
- Prevent File Removal: For one-way syncs, you can prevent files from being deleted on the cloud server if they are removed from your NAS, adding a layer of protection against accidental deletions.
Step 4: Review and Apply Advanced Settings (Optional)
A summary page will display your sync configurations. If you’re ready, click "Done" to start syncing.
Alternatively, you can customize advanced settings, such as:
- Folder Exclusion: Uncheck any subfolders that you don’t want to sync.
- Maximum File Size: Set a size limit to exclude files that exceed this size.
- File Name: Specify names of files you wish to exclude from syncing.
- File Extension: Enter file extensions (e.g., .txt, .iso) to exclude certain types of files.
After configuring your settings, click "Done" to initiate the sync.
Conclusion
Synology NAS devices provide versatile solutions for managing your data, but syncing to the cloud opens up a world of possibilities. Whether you need continuous synchronization with Synology Cloud Sync or easy sync with MultCloud, these two methods are reliable, efficient, and relatively easy to set up. Understanding your needs will help you determine which of these solutions suits you best.
MultCloud Supports Clouds
-
Google Drive
-
Google Workspace
-
OneDrive
-
OneDrive for Business
-
SharePoint
-
Dropbox
-
Dropbox Business
-
MEGA
-
Google Photos
-
iCloud Photos
-
FTP
-
box
-
box for Business
-
pCloud
-
Baidu
-
Flickr
-
HiDrive
-
Yandex
-
NAS
-
WebDAV
-
MediaFire
-
iCloud Drive
-
WEB.DE
-
Evernote
-
Amazon S3
-
Wasabi
-
ownCloud
-
MySQL
-
Egnyte
-
Putio
-
ADrive
-
SugarSync
-
Backblaze
-
CloudMe
-
MyDrive
-
Cubby


