Quick Search:
ownCloud vs Dropbox
ownCloud is a self-hosted file-sharing and syncing service that is designed to provide users with easy access to data. With ownCloud, users can enjoy safe viewing, sharing, and syncing of information across multiple devices, such as computers and phones.
Dropbox is another excellent cloud storage service that offers 2GB of free storage space for users to stash and manage different kinds of files. When collaborating with non-Dropbox users, people can make Dropbox file requests to improve work efficiency.
Both ownCloud and Dropbox are useful. But they are different in many aspects, such as:
| ownCloud | Dropbox | |
|---|---|---|
| Open source | √ | × |
| Maximum file size | Unlimited | 50GB |
| Available Device | All except Web | Web, Desktop, Mobile |
| Virtual File System | √ | × |
| Ransomware protection | √ | × |
To improve your work efficiency, it’s recommended to utilize both two cloud drives and take advantage of their benefits. And it’s common for users to sync data between ownCloud and Dropbox to make better management. However, how to sync ownCloud with Dropbox in a hassle-free way? You can learn 2 main and easy methods in this post. If you are interested, read further.
Easiest Way to Make ownCloud Dropbox Sync
The most efficient method to sync data between ownCloud and Dropbox is to utilize a third-party cloud sync service called MultCloud. As you can see from its name, it is an integrated platform to help users manage different cloud services/accounts. In this way, users don’t need to head to different clouds to manage data on them separately.
Currently, MultCloud supports over 30 leading and popular cloud services on the market, such as Google Drive, Dropbox, ownCloud, pCloud, Google Photos, OneDrive, Google Workspace, OneDrive for Business, Dropbox Business, FTP, NAS, Amazon S3, MEGA, SharePoint, Wasabi, and so on.
By adding those clouds to MultCloud, users can manage them in one place without frequent account shifting. Meanwhile, users are allowed to perform many basic features on each cloud, including downloading, sharing, renaming, copying, uploading, removing, and so on. Moreover, syncing files between clouds via MultCloud is such a piece of cake since:
- 10 Threads of Data Sync. MultCloud offers the leading syncing speed compared to competitors. In other words, users can sync files between clouds successfully and quickly even if there are many files to sync.
- Real-Time Sync. MultCloud allows users to sync files in real time, which makes it more intelligent to accomplish the syncing process.
- Schedule Sync. Users are able to make automatic tasks and MultCloud will run them on time. There are 4 choices for users to select, including running at a regulated time, daily, weekly, and monthly.
- Offline Sync. MultCloud depends on data traffic to sync folders between cloud drives, so users no longer need to worry about the network/internet connection. Even though the internet is not available, data can still be synced between clouds easily and quickly.
Now, you can follow the following steps to learn how to make ownCloud Dropbox sync via MultCloud:
Step 1: Sign up for a MultCloud account on the web. Alternatively, sign in with your Google or Facebook account.
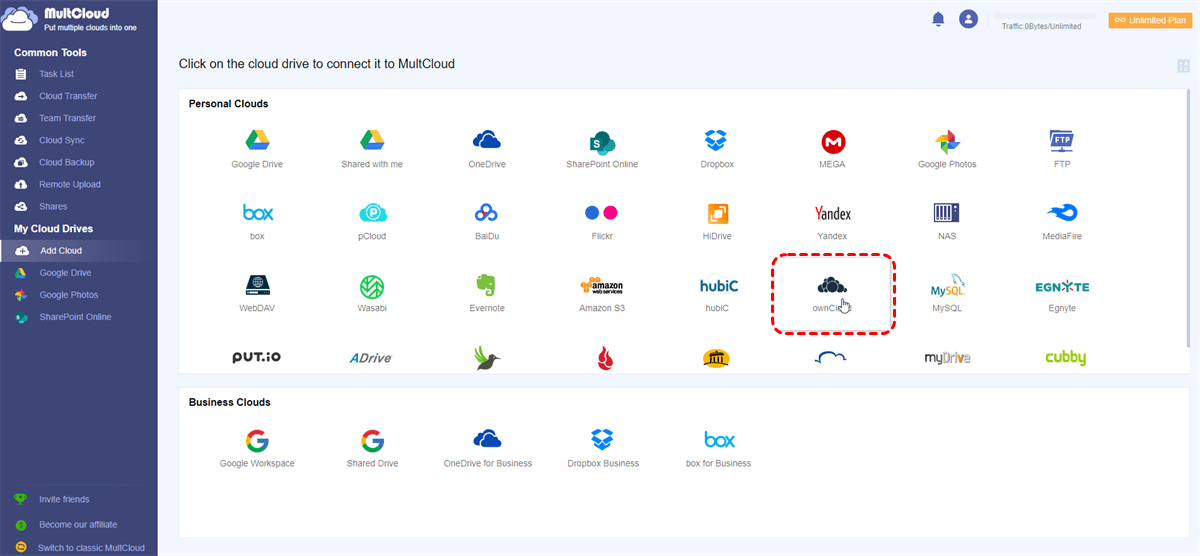
Step 2: Tap the Add Cloud button on the left-hand taskbar and add ownCloud and Dropbox by hitting their icons respectively. Then grant MultCloud access by following the guidance shown on your screen.
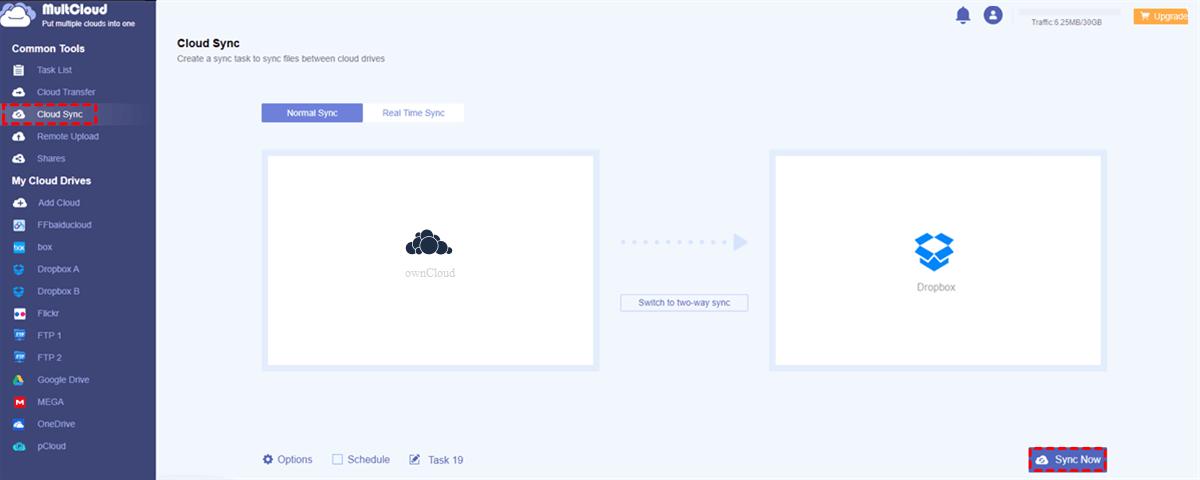
Step 3: Now, go to Cloud Sync on the left upper side. Then tap the first box to choose ownCloud and the second box to select Dropbox. Finally, click on the Sync Now tab to start the task.
Conversely, if you want to sync Dropbox to ownCloud, you can apply the same operations. And the only difference is that you need to re-select the source and target cloud drives. Apart from that, you also sync two ownCloud via MultCloud in a seamless way.
Manual Way to Make ownCloud Dropbox Sync
The other way to make ownCloud Dropbox sync is to download first from ownCloud and manually upload what you’ve downloaded to Dropbox. If you don’t want to utilize third-party services and only have a few files to sync between ownCloud and Dropbox, you can use this method. The prerequisite is that you should make sure your internet connection is stable during the process.
Now, you can follow the step-by-step operations in the following content to learn how to sync ownCloud to Dropbox manually.
Step 1: sign in to your ownCloud with your credentials. Then locate the data you want to sync.
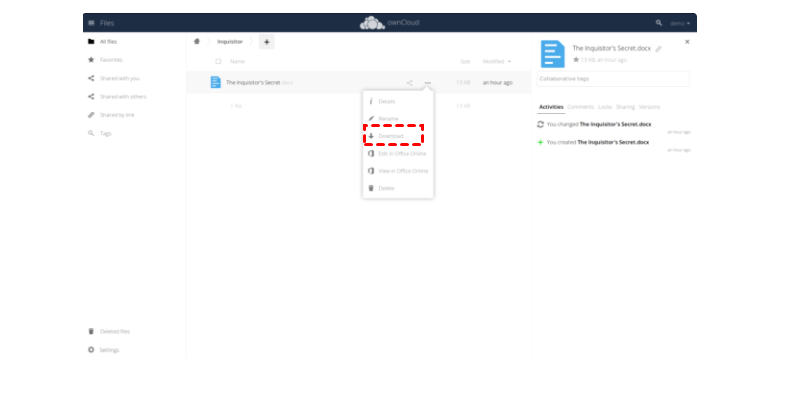
Step 2: Select the file and click on the three dots to select Download.
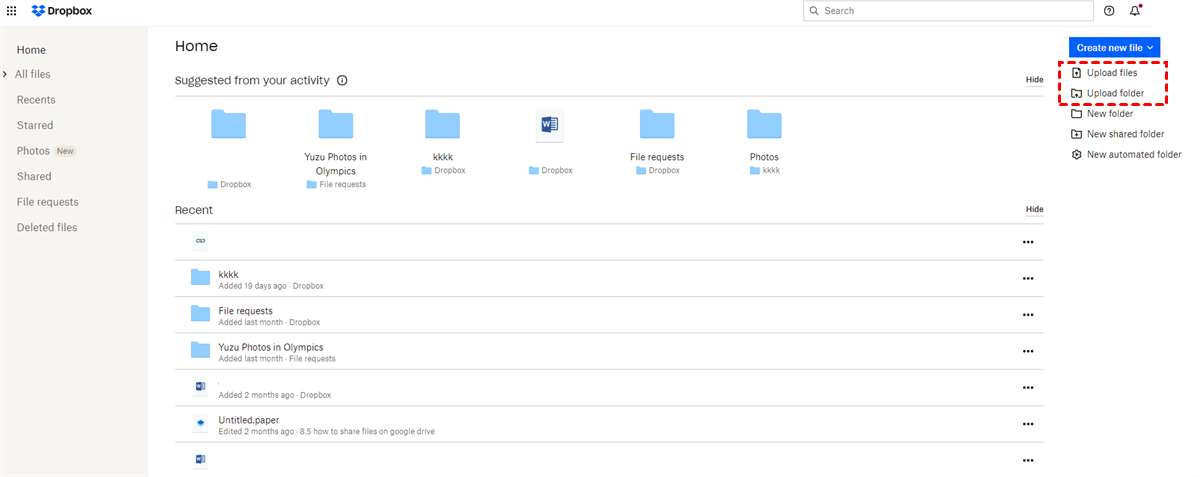
Step 3: Now, sign in to your Dropbox on the web, and upload the downloaded data on your local device.
After uploading the downloaded files from ownCloud to Dropbox, the syncing process is done. If your internet connection is stable, the process can be accomplished quickly and smoothly. Whereas if the internet is not stable, the process will be restarted all over again. Also, the download-and-upload method is just one-time sync. Contrastingly, MultCloud is smarter since if there is a change, the sync will be automatically triggered.
Final Words
After reading the whole text, you can make ownCloud Dropbox sync in 2 main methods. One is to utilize an excellent cloud sync service – MultCloud; the other is to utilize the download-and-upload method. No matter what method you use, files can be synced from ownCloud to Dropbox successfully.
If you turn to MultCloud, you not only can sync files across cloud drives in a hassle-free way but also transfer and back up files across clouds easily. For example, when you plan to backup Google Photos to Synology NAS, MultCloud can work it out effortlessly.
MultCloud Supports Clouds
-
Google Drive
-
Google Workspace
-
OneDrive
-
OneDrive for Business
-
SharePoint
-
Dropbox
-
Dropbox Business
-
MEGA
-
Google Photos
-
iCloud Photos
-
FTP
-
box
-
box for Business
-
pCloud
-
Baidu
-
Flickr
-
HiDrive
-
Yandex
-
NAS
-
WebDAV
-
MediaFire
-
iCloud Drive
-
WEB.DE
-
Evernote
-
Amazon S3
-
Wasabi
-
ownCloud
-
MySQL
-
Egnyte
-
Putio
-
ADrive
-
SugarSync
-
Backblaze
-
CloudMe
-
MyDrive
-
Cubby
