Quick Search:
What Are IDrive and NAS?
Before we delve into the backup process, let's clarify what IDrive and NAS are.
IDrive: A Cloud Backup Solution
IDrive is a cloud-based backup service that allows you to store your files securely online. It offers features like continuous data protection, file versioning, and disaster recovery.
NAS: Network Attached Storage
A NAS is a dedicated storage device connected to your network. It provides centralized storage for files, allowing multiple users to access and share data. NAS devices offer fast data transfer speeds, large storage capacities, and advanced features like RAID for data redundancy.
>>You may want to compare QNAP vs Synology.
Why Backup IDrive to NAS?
You might wonder why you need to backup IDrive files to a NAS when they’re already safely stored in the cloud. Here are some compelling reasons:
1. Benefits of Local Backup
- Faster access: Retrieving files from a local NAS is generally much faster than downloading them from the cloud.
- Offline access: If you lose internet connectivity, you can still access your files on the NAS.
- Large file transfers: Transferring large files to and from the cloud can be time-consuming. A NAS offers a faster alternative.
2. Overcoming Cloud Backup Limitations
While cloud backup is excellent, it’s not without limitations. A NAS can complement your cloud backup strategy by providing additional protection and flexibility.
3. Disaster Recovery and Business Continuity
In the event of a catastrophic disaster that affects your home or office, having your data backed up to a NAS in a different location can be a lifesaver. It allows you to quickly restore your files and get back to business.
Top 2 Ways for Making IDrive Backup to NAS
There are 2 ways to back up your IDrive files to the NAS. You can directly download them from the cloud or use a third-party backup tool --- MultCloud for schedule automatic backups.
Way 1. Backup IDrive to NAS via Downloading and Uploading
If you want to back up your files from IDrive to a local NAS, you can do so by first downloading the files to a local device and then moving them to the NAS. The steps are as follows:
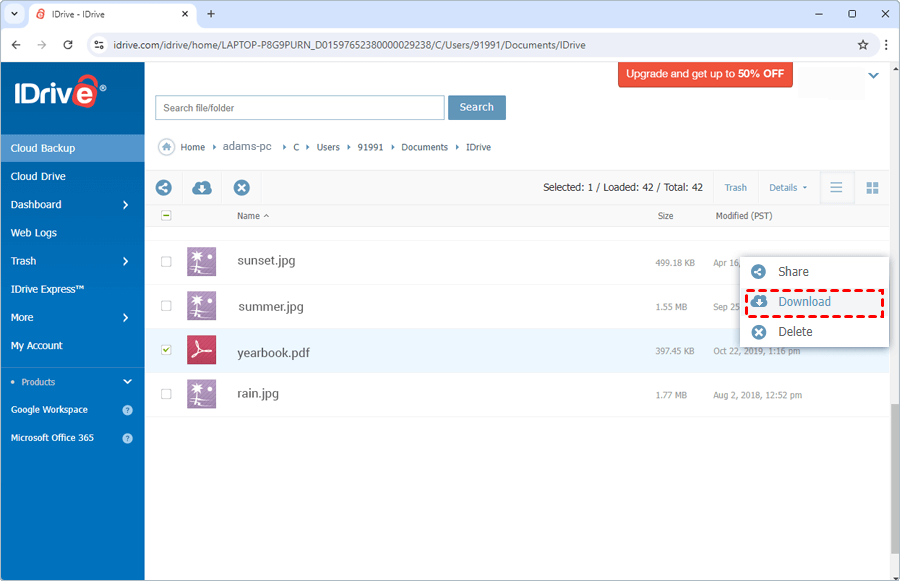
1. Download Files from IDrive:
- Log in to your IDrive account via the desktop app or web interface.
- Navigate to the files or folders you wish to back up to the NAS.
- Select the files and download them to a local directory on your computer.
2. Transfer Files to NAS:
- Ensure your NAS is connected to your network and accessible from your computer.
- Open the file explorer on your computer and locate the downloaded files.
- Copy or move the files to the appropriate folder on your NAS.
Way 2. Automatically Backup IDrive to NAS via Cloud Backup Tool
If you frequently back up files from IDrive to your NAS, consider using third-party software --- MultCloud to automate the process of syncing files to the NAS. Whether you use Synology or QNAP, MultCloud can easily connect your IDrive and NAS accounts in the same interface. Then, you can use the professional cloud backup function to complete the automatic data backup operation.
- ✅Simple: The whole process is easy to operate without complicated upload and download operations.
- ✅Automatic: The system can run backup tasks at the set time.
- ✅Incremental: The system only backs up modified or added content to a specific location.
- ✅Fast: Dedicated servers provide faster backup speeds.
Here are the simple steps.
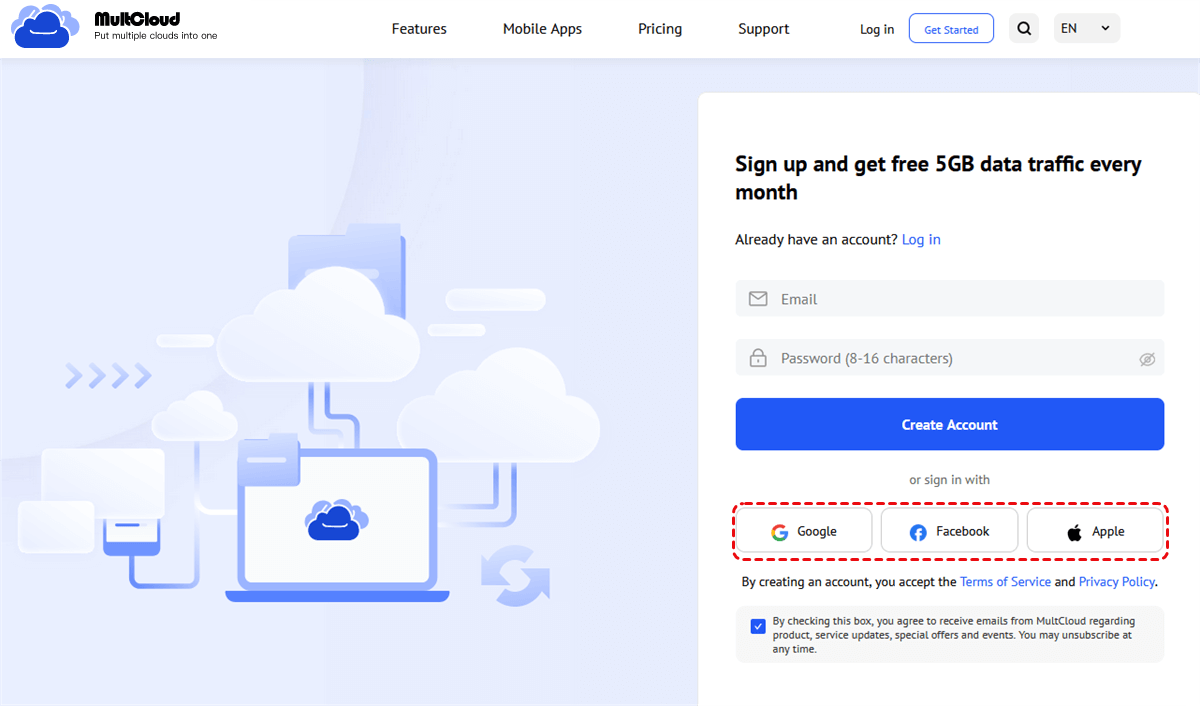
Step 1. Sign up for a MultCloud account: Register an account using your email address, or log in directly using Google, Facebook or Apple ID.
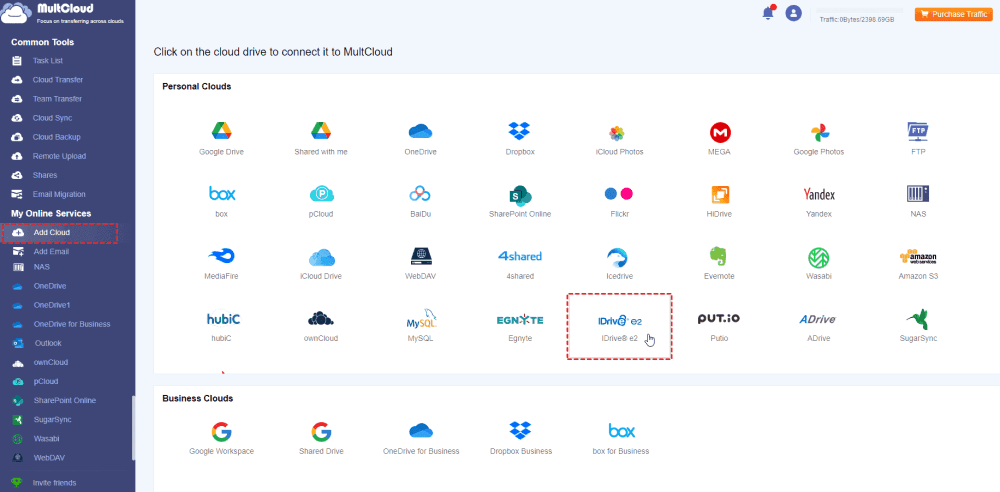
Step 2. Add IDrive to MultCloud: Log in to your MultCloud account. Click "Add Cloud" on the left sidebar. Select "IDrive® e2" and enter the required information (Endpoint, Access Key ID, and Secret Access Key). You can find these details in your IDrive account settings. Then, click "Add IDrive® e2".
Step 3. Add NAS to MultCloud: Click "Add Cloud" again. Select "NAS" and enter the necessary credentials for your NAS (IP address, username, password). Then, click "Add Account".
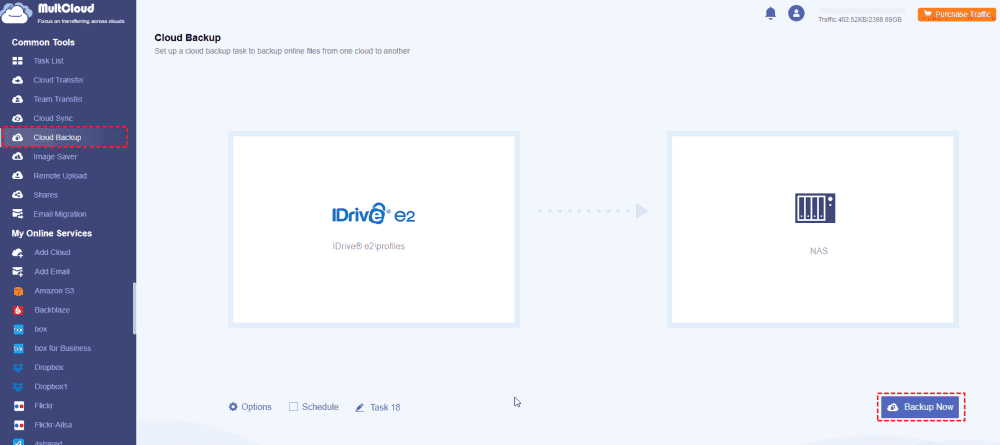
Step 4. Backup IDrive to NAS: Click "Cloud Backup" on the left sidebar. Select IDrive or folders in it as the source cloud and your NAS or folders in it as the destination. Click "Backup Now" to start the backup process.
Tips:
- Filter: You can use the "Filter" option to exclude specific file types from the transfer.
- Schedule: MultCloud allows you to back up data across cloud accounts automatically.
In addition to the above data backup services, MultCloud also supports you to transfer or synchronize data between clouds, and even save web and email data.
- Cloud Transfer: Transfer files between different cloud drives, e.g. Google Drive to S3.
- Team Transfer: Migrate data of team members across business accounts.
- Cloud Sync: Keep files updated across multiple drives, e.g. syncing Google Photos to Synology.
- Remote Upload: Directly achieve cloud torrenting without any parsing tools.
- Email Migration: Transfer emails to local devices or cloud storage accounts.
- Image Saver: Download images from websites, e.g. downloading pictures from Google Image Search.
- Share: Share cloud files with anyone.
Conclusion
Backing up your iDrive data to a NAS is a crucial step in safeguarding your valuable information. By following the methods outlined in this article, you can create a robust backup strategy that protects your data from potential disasters. Remember, prevention is always better than cure, so don't wait until it's too late to start protecting your data.
MultCloud Supports Clouds
-
Google Drive
-
Google Workspace
-
OneDrive
-
OneDrive for Business
-
SharePoint
-
Dropbox
-
Dropbox Business
-
MEGA
-
Google Photos
-
iCloud Photos
-
FTP
-
box
-
box for Business
-
pCloud
-
Baidu
-
Flickr
-
HiDrive
-
Yandex
-
NAS
-
WebDAV
-
MediaFire
-
iCloud Drive
-
WEB.DE
-
Evernote
-
Amazon S3
-
Wasabi
-
ownCloud
-
MySQL
-
Egnyte
-
Putio
-
ADrive
-
SugarSync
-
Backblaze
-
CloudMe
-
MyDrive
-
Cubby
