Quick Search:
Understanding IDrive and External Drives
IDrive is an online backup service where one can safely store and protect all the important files. In contrast, external drives are physical devices themselves, which are connected to the computer and enhance the storage capacity of one's computer.
What is IDrive?
IDrive is a cloud backup company that securely and efficiently stores and protects your data. It supports features such as automatic backups, remote access, version control, and disaster recovery. >> Be straightforward: how to use IDrive.
Types of External Drives
There are two major types of external drives: Hard Disk Drives and Solid-State Drives.
- Hard Disk Drives: Traditional devices for storing data, HDDs function on the principle of rotation of disks. They are much cheaper but offer lower reading and writing speeds compared to SSDs.
- Solid-State Drives: SSD is a new kind of device based on flash memory for storing data. They are much faster, more reliable, and quieter as compared to HDDs, though they are costlier.
Benefits of Backing Up External Drives with IDrive
Backing up your external drives with IDrive offers several benefits, including:
Data Protection and Security
IDrive uses advanced encryption to protect your data from unauthorized access. It also provides features like version control and disaster recovery to help you recover lost or deleted files.
Remote Access and Accessibility
With IDrive, you can access your backed-up files from anywhere in the world with an internet connection. This is especially useful if you need to access your data while traveling or in case of a computer failure.
Version Control and History
IDrive keeps multiple versions of your files, allowing you to revert to previous versions if needed. This is helpful if you accidentally overwrite or delete important files.
Disaster Recovery
In the event of a disaster like a fire, flood, or theft, IDrive can help you recover your lost data. You can simply restore your files to a new computer or external drive.
You may want to know how to:
Preparing Your External Drive for Backup
Before backing up your external drive with IDrive, it's important to prepare it properly.
Step 1. Formatting Your Drive
Ensure that your external drive is formatted in a compatible file system, such as NTFS for Windows or APFS for macOS.
Step 2. Organizing Your Files
Create a well-organized folder structure on your external drive to make it easier to manage and find your files.
Step 3. Creating a Backup Schedule
Decide how often you want to back up your external drive. Consider factors like how frequently you modify your files and the importance of your data.
Let’s Make IDrive Backup External Drives
To start backing up your external drive with IDrive, you'll need to set up your IDrive account and configure the backup settings.
Step 1. Installing IDrive Software
Download and install the IDrive software on your computer.
Step 2. Creating an IDrive Account
Create an IDrive account and choose a suitable backup plan.
Step 3. Choosing Disk Clone Option
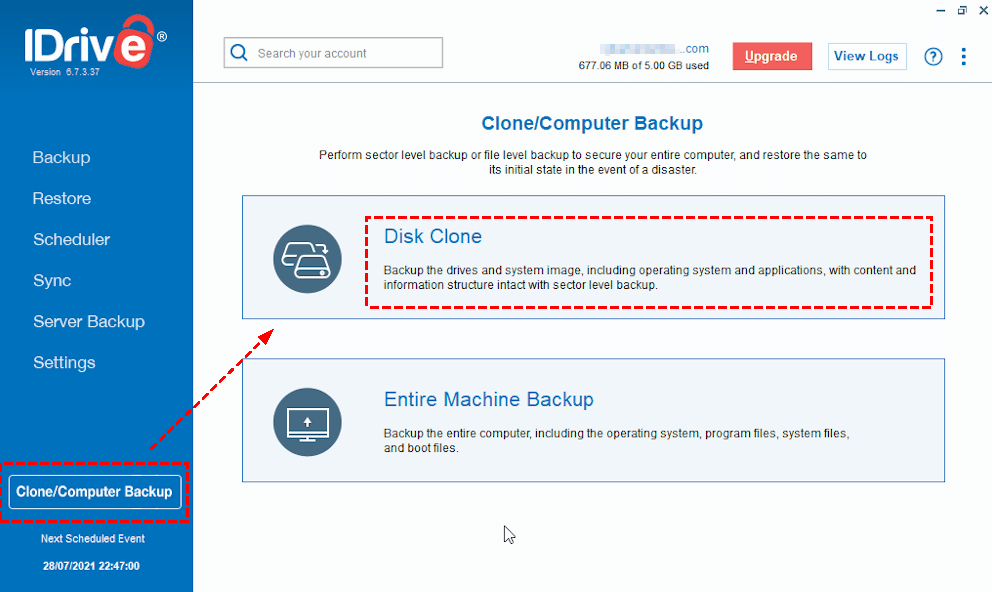
Select "clone/computer backup" in the bottom-left corner, then choose "Disk Clone".
Step 4. Performing a Backup
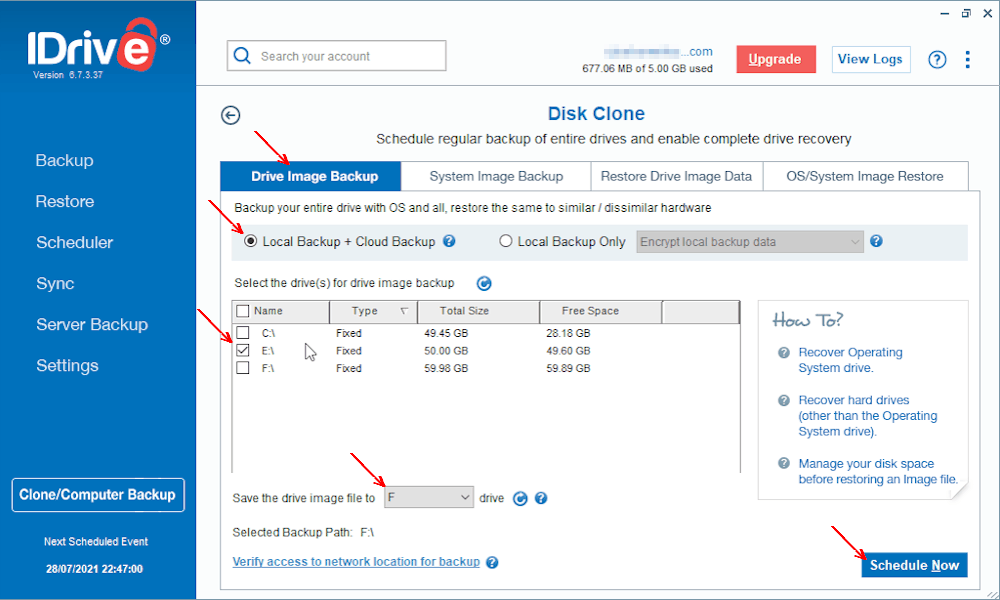
Map the external drives to a disk on your computer in advance, then, according to the screenshot, configure the backup settings, such as backup frequency, file types, and encryption options.
Once you've set up IDrive, you can start backing up your external drive.
- Initial Full Backup: The first backup will be a full backup, which will copy all of your files to the IDrive cloud.
- Incremental Backups: After the initial full backup, IDrive will perform incremental backups, which only backup the changes made since the last backup.
Notes:
- The frequency of your backups will depend on how often you modify your files and the importance of your data. Consider factors like how frequently you create or edit files and the potential consequences of data loss.
- IDrive offers various backup options and settings, such as file filtering, compression, and encryption. Customize these settings to meet your specific needs.
Step 5. Verifying and Testing Your Backup
It's important to verify and test your backup to ensure that it's working correctly.
- Checking Backup Status: Use the IDrive software to check the status of your backups and identify any issues.
- Performing a Test Restore: To test your backup, restore a few files to a different location and verify that they are intact.
Troubleshooting Common Backup Issues
If you encounter any problems during the backup process, try the following troubleshooting tips:
Slow Backup Speeds
If your backups are slow, try backing up during off-peak hours or increasing your internet speed.
Backup Failures
If the IDrive backup failure occurs, check for errors in the IDrive software or ensure that your external drive is connected properly.
Connection Problems
If you're experiencing connection problems, check your internet connection or try connecting your external drive to a different USB port.
Additional Tips and Considerations
Here are some additional tips and considerations for backing up your external drives with IDrive:
Encryption and Security Best Practices
Enable encryption to protect your data from unauthorized access. Use a strong password for your IDrive account and keep it secure.
Cloud Storage vs. Local Backup
Consider the advantages and disadvantages of cloud storage vs. local backup. Cloud storage offers remote access and disaster recovery, while local backup can be faster and more reliable in some cases.
Choosing the Right IDrive Plan
Select an IDrive plan that meets your storage needs and budget. Consider factors like the amount of data you need to back up and the features you require.
Conclusion
Backing up your external drives with IDrive is a simple and effective way to protect your important data. By following the steps outlined in this guide, you can ensure that your files are safe and accessible whenever you need them.
Additional Tip: Best Way to Transfer Data Between IDrive e2 and Other Clouds
As an S3 data storage service, IDrive e2 is loved by many users and enterprises. However, migrating data between IDrive e2 and many popular cloud services is a tricky problem. Here, you can use the cloud file manager --- MultCloud introduced below to easily complete it.
MultCloud supports connecting IDrive e2 and other 30+ cloud services, and moving, syncing or backing up data between them at will, without manual uploading and downloading, just a few steps.
Let's start moving files between IDrive e2 and other clouds.
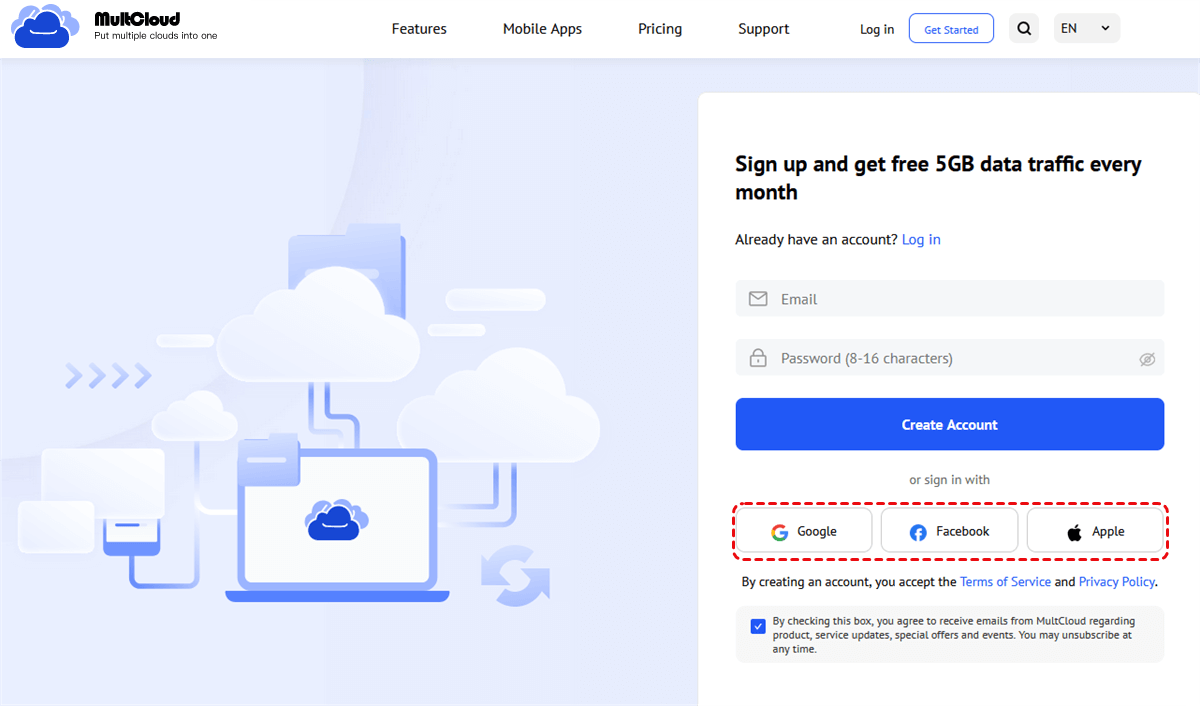
Step 1. Enter the MultCloud homepage, and then register an account using email and account authorization.
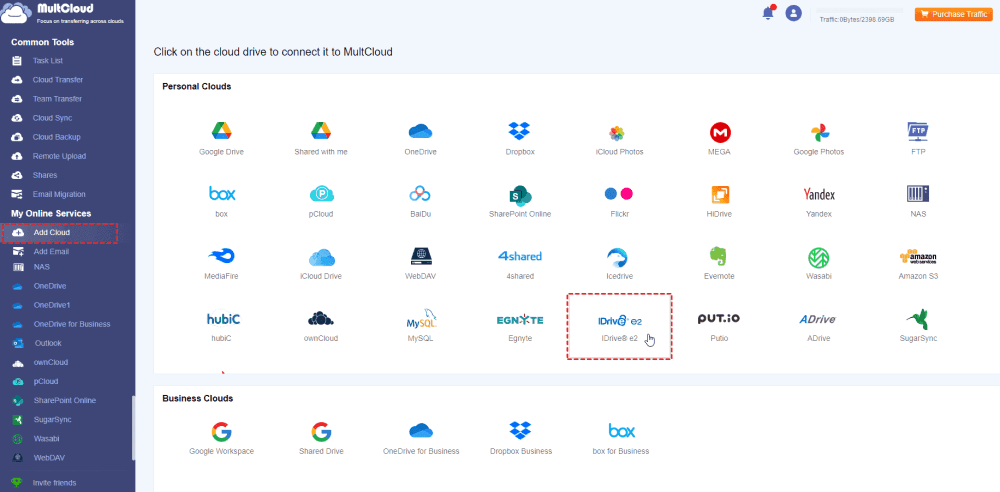
Step 2. Log in to MultCloud, click "Add Cloud", then select the corresponding IDrive e2 symbol, and finally add it to MultCloud according to the prompts. After that, add other cloud accounts in the same way.
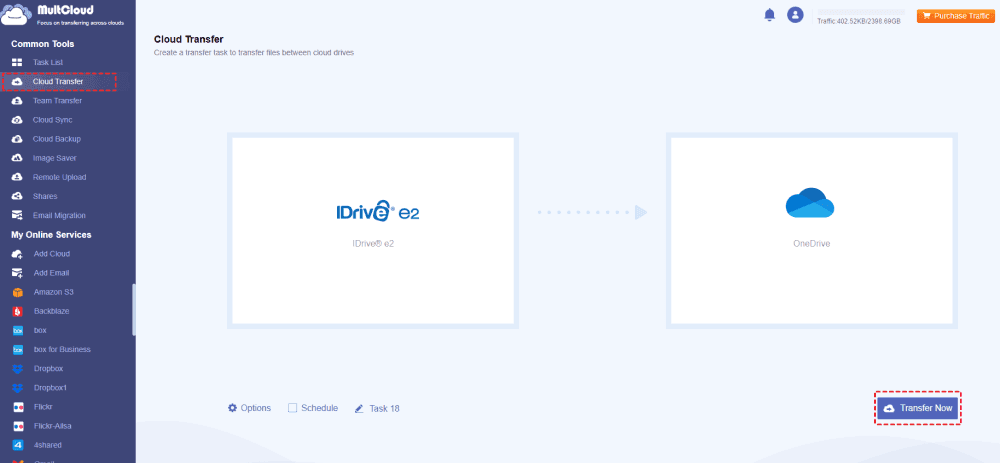
Step 3. Enter the "Cloud Transfer" interface, select the file or folder in IDrive e2 as the source, and select the path in other cloud accounts as the destination. After configuring other options, click "Transfer Now".
Notes:
- If you need to transfer data from other cloud accounts to IDrive, such as transferring Google Drive to IDrive, just add the account and follow the above steps.
- Other core features, such as Team Transfer, Cloud Sync or Cloud Backup, provided by MultCloud can also help you better migrate, sync or backup data between clouds.
MultCloud Supports Clouds
-
Google Drive
-
Google Workspace
-
OneDrive
-
OneDrive for Business
-
SharePoint
-
Dropbox
-
Dropbox Business
-
MEGA
-
Google Photos
-
iCloud Photos
-
FTP
-
box
-
box for Business
-
pCloud
-
Baidu
-
Flickr
-
HiDrive
-
Yandex
-
NAS
-
WebDAV
-
MediaFire
-
iCloud Drive
-
WEB.DE
-
Evernote
-
Amazon S3
-
Wasabi
-
ownCloud
-
MySQL
-
Egnyte
-
Putio
-
ADrive
-
SugarSync
-
Backblaze
-
CloudMe
-
MyDrive
-
Cubby
