User Case: How to Separate iCloud Accounts Safely
Right now, I'm sharing my iCloud account with someone else. My notes, photos, and other data are on the iCloud whereas X's data seems to be locally stored on their device. A number of years ago, this shared account situation was a mistake because the larger picture was not understood.
I want to make a new iCloud account for myself and separate my data from X's. I have to make sure everything is done correctly because we both have important pictures and messages.
How to Separate iCloud Accounts
There are many preparations you have to finish to avoid data loss before separating iCloud accounts. The following suggestions are about how do I separate iCloud accounts on iPhone.
Step 1. Transfer All Your Data to Another Device.
First of all, you can transfer all the data from the old device to the new device. Please make sure that your new device is updated to the latest iOS version and that both of the devices are fully in charge. Actually, it is recommended to keep your device in charge during the transfer process.
1. Turn on the Bluetooth on both of your devices and connect them to the same Wi-Fi.
2. Confirm setting up your iPhone when a pop-up window appears to ask you.
3. Scan the image on your new device with your old device. Here, you may need to enter the password of the old device.
4. Choose to download data from iCloud for file transfer. Then, wait for the task done.
Step 2. Disconnect Your Apps with iCloud
1. Go to Settings on your new iPhone and tap on the profile picture.
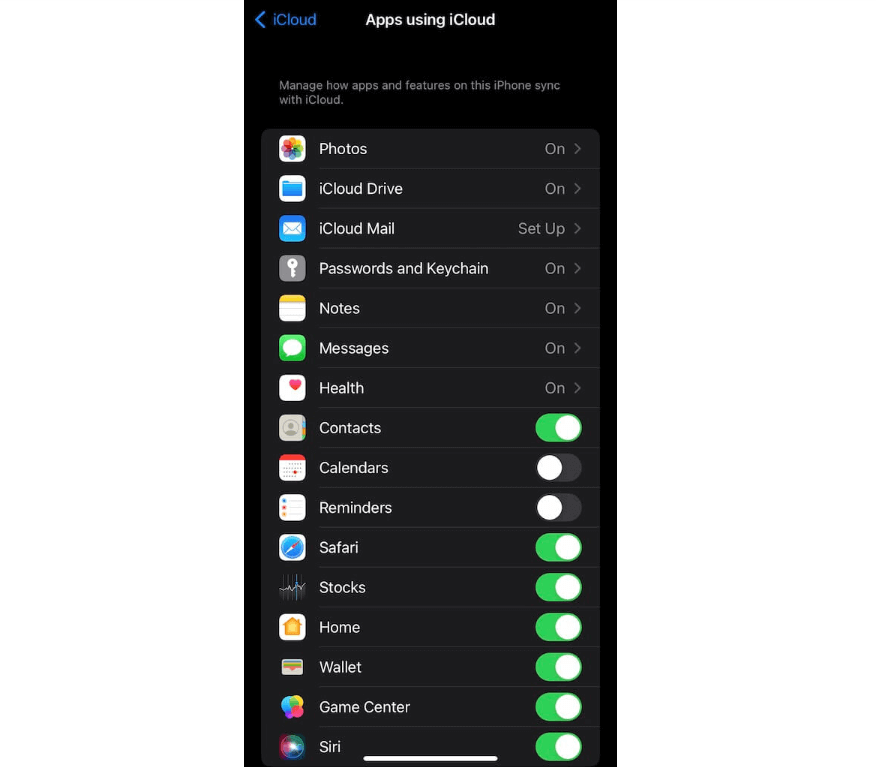
2. Choose iCloud and open Saved to iCloud. Then, turn off the switch next to the apps one by one. When you are asked whether to delete the data or keep it locally, choose to keep it.
Step 3. Manually Move Data to Your iPhone
When you turn off the switch of some services, you may find there is no option to download them locally, such as Notes and iCloud Drive. For these services, you may need to manually move data from iCloud to your device.
If you want to move Notes, you can copy the contents and paste them into new notes. Besides, if you want to move files from iCloud Drive to your iPhone, you can open the Files app > go to iCloud Drive > select the folder or file > choose to download it.
Step 4. Sign out of the Apple ID
Since an iCloud account is related to an Apple ID, if you want to separate iCloud accounts, you have to sign out of the Apple ID. After downloading everything you want from the iCloud, you can:
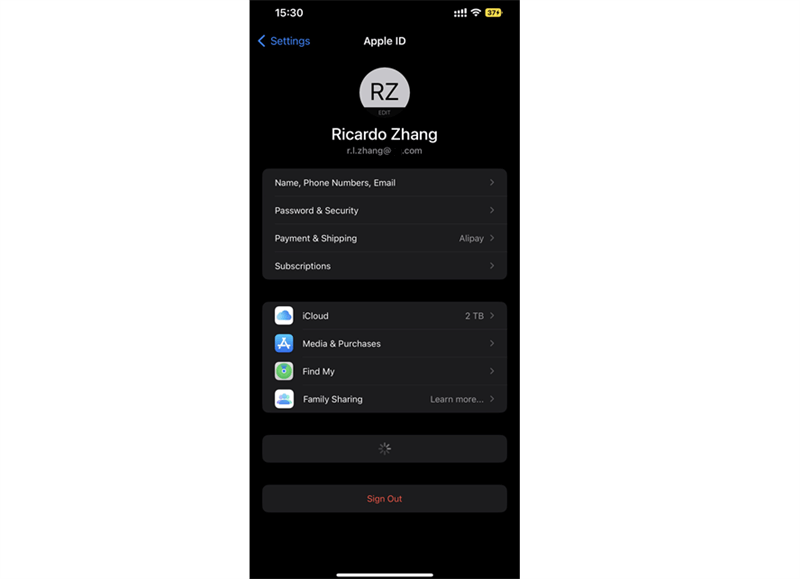
1. Go to Settings on your iPhone.
2. Tap on your profile picture.
3. Click Sign Out at the bottom of this page. Then, you may have to go through the authentication and follow the onscreen structure to log out of your Apple ID.
Step 5. Create a New Apple ID
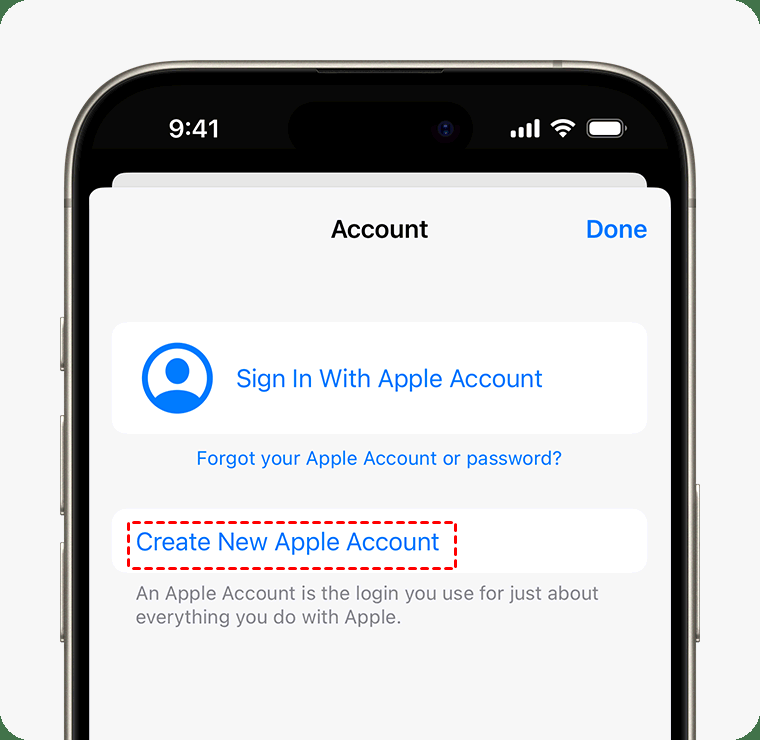
1. Open the App Store app and click on the profile icon.
2. Choose Create New Apple Account.
3. Enter the email address, set a password, and choose the country or region to create an Apple ID.
4. Select the payment method and billing information, or none. Then, click Next.
5. Confirm your phone number and click Next.
6. Verify your email address in an email from Apple. Then, you have a new Apple ID that can be used for a new iCloud account.
After completing the above 6 actions on how to separate iCloud accounts, you have separated the old and the new iCloud accounts with important data migration.
Bonus Tip: Backup iCloud Photos/Files to Another Cloud
If you are still afraid of losing data in iCloud Photos or iCloud after disabling them, you can back them up in another place, such as an external hard drive, a local drive, or a cloud drive. To backup iCloud Photos or iCloud Drive to another cloud, using MultCloud can be your NO.1 choice.
MultCloud is a professional cloud file transfer service that can automatically backup your iCloud Photos or iCloud Drive to Google Drive, Google Photos, OneDrive, Dropbox, OneDrive, Icedrive, MEGA, Amazon S3, etc. without downloading and uploading. Moreover, MultCloud Cloud Backup is equipped with a file versioning feature that can record every backup file version. Therefore, when you want to restore files to iCloud Drive or iCloud Photos, you can choose your preferred version.
Here are example steps for backing up iCloud Drive to Google Drive.
Step 1. Go to the MultCloud website and create a free account.
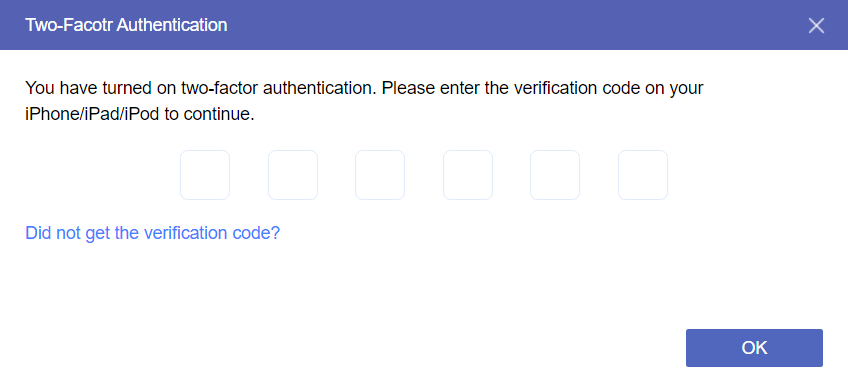
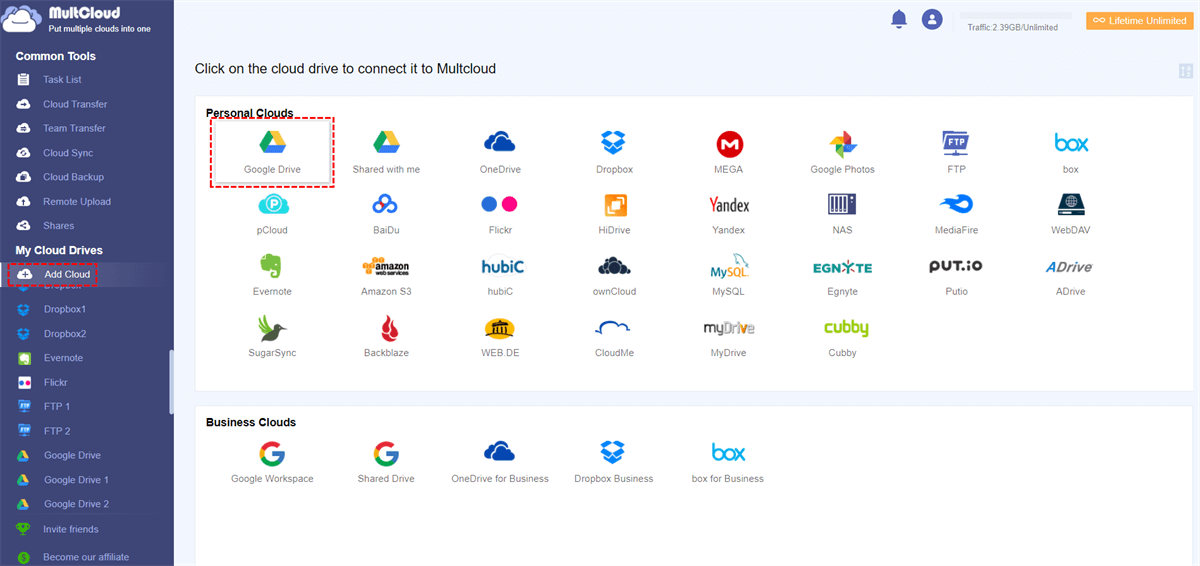
Step 2. Add iCloud Drive to MultCloud by clicking Add Cloud and the iCloud Drive icon. Then, you need to enter your iCloud login credentials and go through two-factor authentication.
Step 3. Click Add Cloud and the Google Drive logo to add Google Drive to MultCloud.
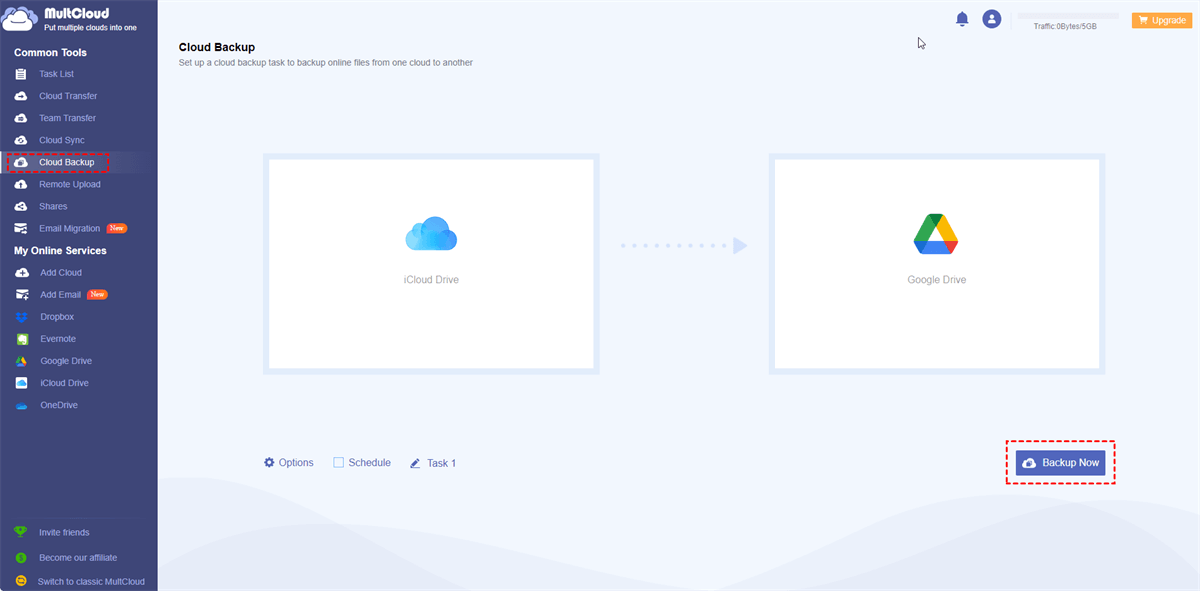
Step 4. Select Cloud Backup in the left sidebar and choose iCloud Drive as the source and Google Drive as the target. Then, click Backup Now to start transferring files from iCloud Drive to Google Drive.
If you want to restore files to iCloud Drive, Go to Task List to find the backup task. Then, click the 3-line button and choose Restore in the dropdown menu. Next, you can choose a backup version to restore and where to save these files. Finally, click Restore to restore files from Google Drive to iCloud Drive.
Note: MultCloud offers 5GB of free traffic to transfer files between clouds. If you need more, you can upgrade to a paid plan to get more data traffic and enjoy faster transfer speed.
Conclusion
This post gives 5 steps on how to separate iCloud accounts. You can follow these steps to separate iCloud accounts without losing data. What’s more, there is the easiest way to backup your iCloud Photos or iCloud Drive to another cloud for additional protection.
MultCloud Supports Clouds
-
Google Drive
-
Google Workspace
-
OneDrive
-
OneDrive for Business
-
SharePoint
-
Dropbox
-
Dropbox Business
-
MEGA
-
Google Photos
-
iCloud Photos
-
FTP
-
box
-
box for Business
-
pCloud
-
Baidu
-
Flickr
-
HiDrive
-
Yandex
-
NAS
-
WebDAV
-
MediaFire
-
iCloud Drive
-
WEB.DE
-
Evernote
-
Amazon S3
-
Wasabi
-
ownCloud
-
MySQL
-
Egnyte
-
Putio
-
ADrive
-
SugarSync
-
Backblaze
-
CloudMe
-
MyDrive
-
Cubby
.png)
