Can I Uninstall Microsoft SharePoint?
Uninstalling Microsoft SharePoint from your system involves several steps to ensure a clean removal. Whether you're on Windows 10 or another operating system, it's essential to follow a systematic approach to avoid any leftover files or configurations.
How to Uninstall Microsoft SharePoint
For a thorough uninstallation of SharePoint from your PC, follow these steps:
1. Uninstall SharePoint from Control Panel
1. Navigate to "Control Panel" > "Programs" > "Programs and Features".
2. Locate "Microsoft SharePoint" in the list of installed programs.
3. Right-click on "Microsoft SharePoint" and select "Uninstall".
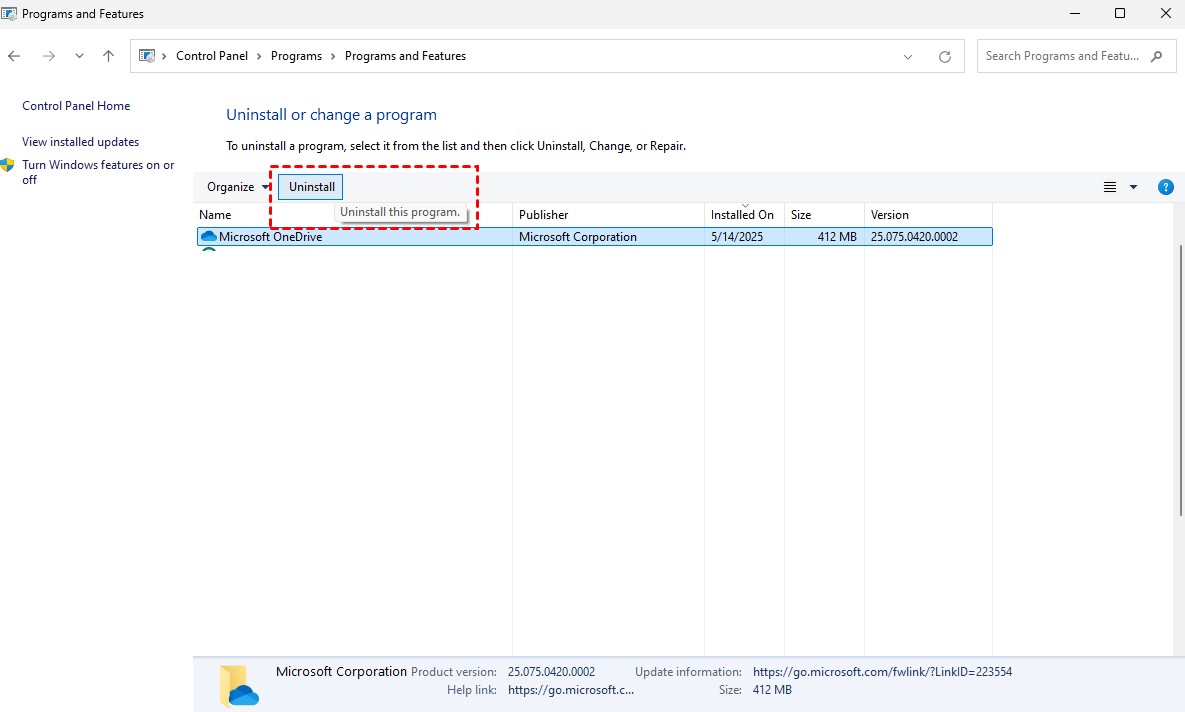
Follow the onscreen prompts to uninstall SharePoint.
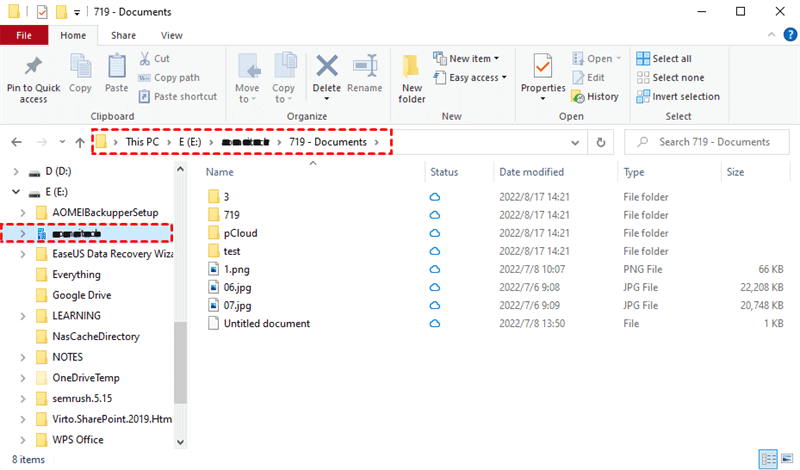
2. Delete SharePoint Folders
1. Open File Explorer.
2. Navigate to the installation directory of SharePoint (commonly in **C:\Program Files\Microsoft Office Servers** or **C:\Program Files\Common Files\Microsoft Shared\Web Server Extensions**).
3. Delete the SharePoint folders and subfolders.
3. Remove SharePoint Services
1. Press "Win + R", type "services.msc", and press "Enter".
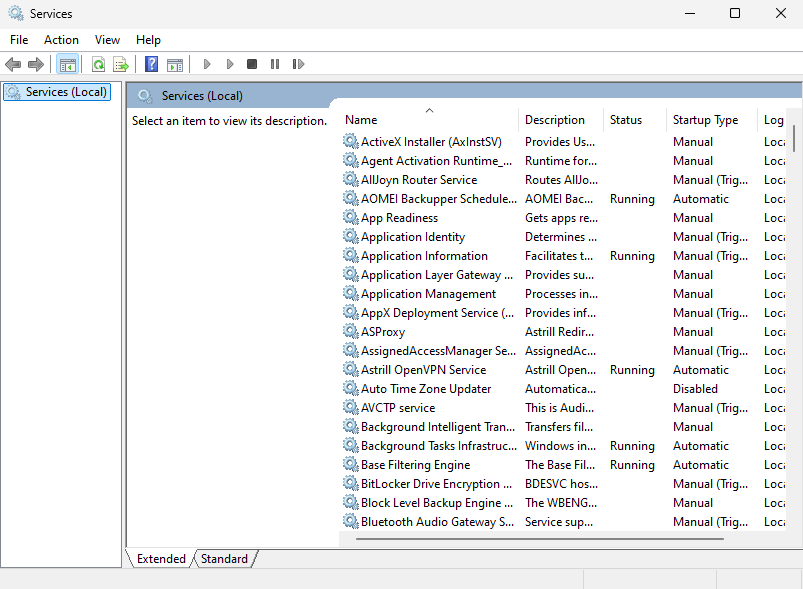
2. Locate any services related to SharePoint (e.g., "SharePoint Timer Service", "SharePoint Administration Service").
3. Right-click on each SharePoint service and select "Stop".
4. Once stopped, right-click again and select "Properties".
5. Change the "Startup type" to "Disabled".
6. Click "OK" to apply the changes.
4. Clean SharePoint Registry Entries
1. Press "Win + R", type "regedit", and press "Enter" to open the Registry Editor.
2. Navigate to "HKEY_LOCAL_MACHINE\SOFTWARE\Microsoft\Shared Tools\Web Server Extensions".
3. Delete the "SharePoint" folder.
4. Navigate to "HKEY_LOCAL_MACHINE\SYSTEM\CurrentControlSet\Services\" and delete any SharePoint-related entries.

5. Check for SharePoint Dependencies
- Review installed applications and features for any dependencies on SharePoint.
- Uninstall or disable any dependent software that may hinder SharePoint's complete removal.
Removing SharePoint Without Admin Rights: Is It Possible?
Removing SharePoint without admin rights can indeed be challenging, but there are alternative methods you can explore:
Using Third-Party Uninstaller Tools
Look for reputable third-party uninstaller tools specifically designed to operate without administrative privileges. Ensure the tools adhere to security principles and are trusted to handle software removal safely.
Manual Removal Methods
Consider manual removal methods that do not require administrative access, such as deleting SharePoint-related files and folders directly from your user profile directories. Exercise caution to avoid inadvertently deleting critical system files or configurations.
Seeking IT Support
If you encounter difficulties or uncertainties, seek assistance from your IT department or a knowledgeable professional. They can provide guidance on safe removal procedures and may have tools or methods tailored for your organization's specific setup.
Testing in Controlled Environments
Before proceeding with any removal method, test it in a controlled environment to ensure it effectively removes SharePoint without adverse effects on your system. Document your steps and verify the completeness of the removal process.
If uninstalling SharePoint without admin rights is part of a larger maintenance or reinstallation plan, coordinate with IT personnel to ensure compliance with organizational policies and procedures.
Pro Tips: Make A Backup before Deleting or Uninstalling SharePoint
Since uninstalling may damage some essential data stored within SharePoint sites, and then lead to data loss, it is crucial to back up all important SharePoint data beforehand. As for SharePoint backup, you can back up them to a local/external hard drive or another cloud drive. If easy access is what you care about most, backing SharePoint to another cloud is more recommended.
To back up one cloud to another cloud, you cannot get a way from the SharePoint native features. Luckily, there are third-party tools that can help you out. Among all available options, the MultCloud stands out relying on its wide compatibility, ease of use, reliability, etc. It supports about 40 personal and business cloud drives such as Google Drive, Google Workspace, OneDrive, OneDrive for Business, Dropbox, Dropbox for Business, SharePoint, iCloud Drive, iCloud Photos, MEGA, and so on.
- Cloud Transfer: Move one cloud data to another without downloading and re-uploading.
- Cloud Sync: Sync data across clouds seamlessly in real time.
- Cloud Backup: Dynamically backup and restore files between clouds.
- Automatic: Set up a schedule to make a task automatically run as preferred.
- Offline: Transfer, sync, or backup cloud data online without going through the local storage.
- Efficient: Access and manage all your clouds with a single login.
By backing up your SharePoint data beforehand, you can mitigate risks and have the peace of mind that your valuable information remains safe and accessible even after the uninstallation is completed.
MultCloud Supports Clouds
-
Google Drive
-
Google Workspace
-
OneDrive
-
OneDrive for Business
-
SharePoint
-
Dropbox
-
Dropbox Business
-
MEGA
-
Google Photos
-
iCloud Photos
-
FTP
-
box
-
box for Business
-
pCloud
-
Baidu
-
Flickr
-
HiDrive
-
Yandex
-
NAS
-
WebDAV
-
MediaFire
-
iCloud Drive
-
WEB.DE
-
Evernote
-
Amazon S3
-
Wasabi
-
ownCloud
-
MySQL
-
Egnyte
-
Putio
-
ADrive
-
SugarSync
-
Backblaze
-
CloudMe
-
MyDrive
-
Cubby