What is a Shared Mailbox in Outlook?
A shared mailbox is a specialized type of mailbox designed to be accessed by multiple users. Unlike personal mailboxes, it doesn't have an individual password. Instead, users access it using their existing Office 365 credentials. Shared mailboxes are commonly used for various purposes, such as:
- General Inboxes: A centralized location for receiving and responding to general inquiries.
- Help Desks: A shared resource for a team of support agents to handle customer support requests.
- Sales Teams: A collaborative platform for sales teams to share leads, track deals, and coordinate activities.
How to Create and Open a Shared Mailbox in Outlook
Today, we will tell you how to create and access a shared mailbox in Outlook step by step for your reference.
Part 1. Create or Set Up a Shared Mailbox in Outlook Web
Before you can access a shared mailbox, it needs to be created and configured by your organization's IT administrator. Once it's set up, you can access it through the Outlook Web App as follows:
Step 1. Sign in Micosoft admin center with Exchange admin role.
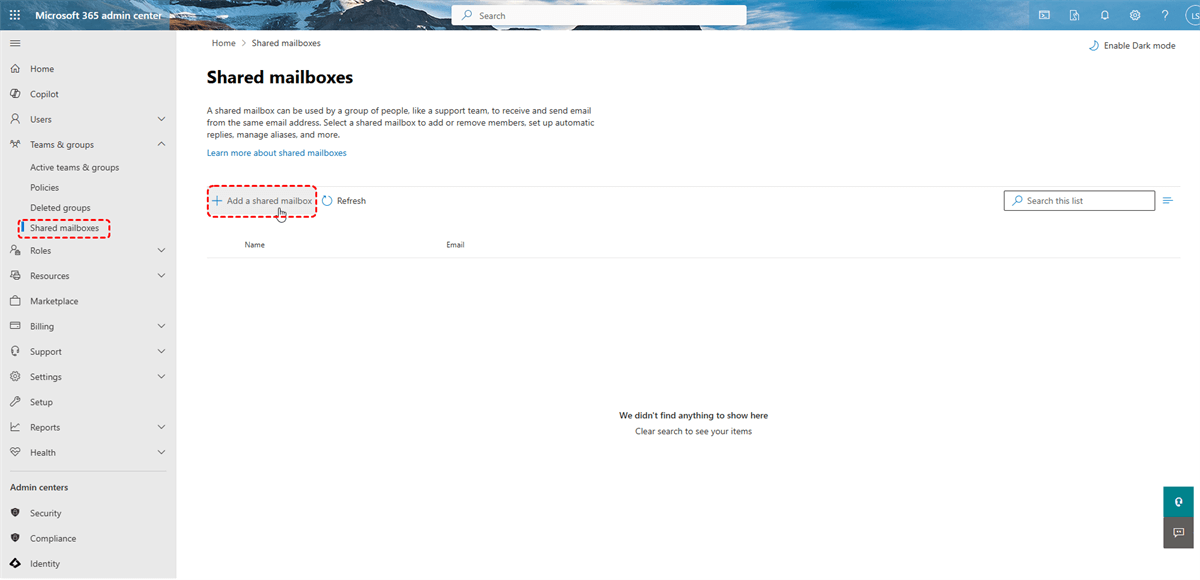
Step 2. In the admin center, go to the "Teams & Groups" > "Shared mailboxes" page.
Step 3. On the new "Shared mailboxes" page, select "+ Add a shared mailbox".
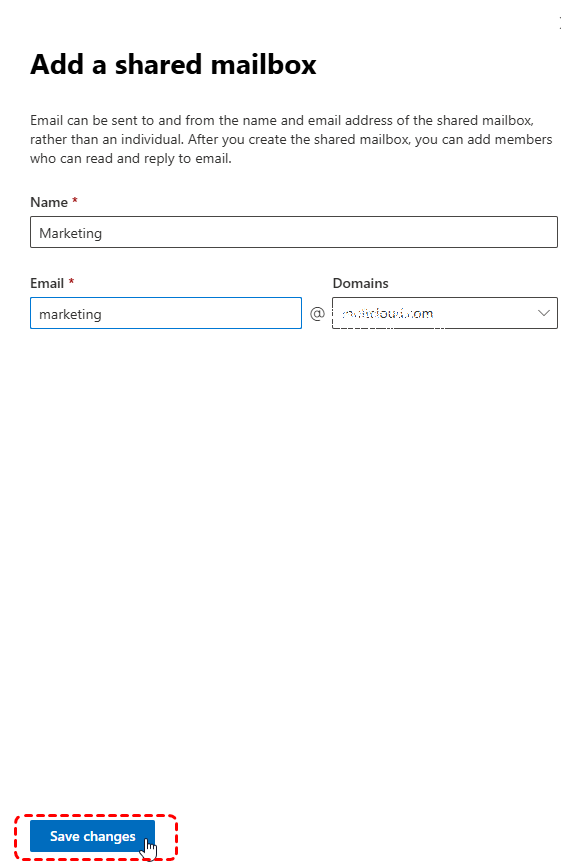
Step 4. Enter a name for the shared mailbox and choose the email address. Then click on "Save Changes".
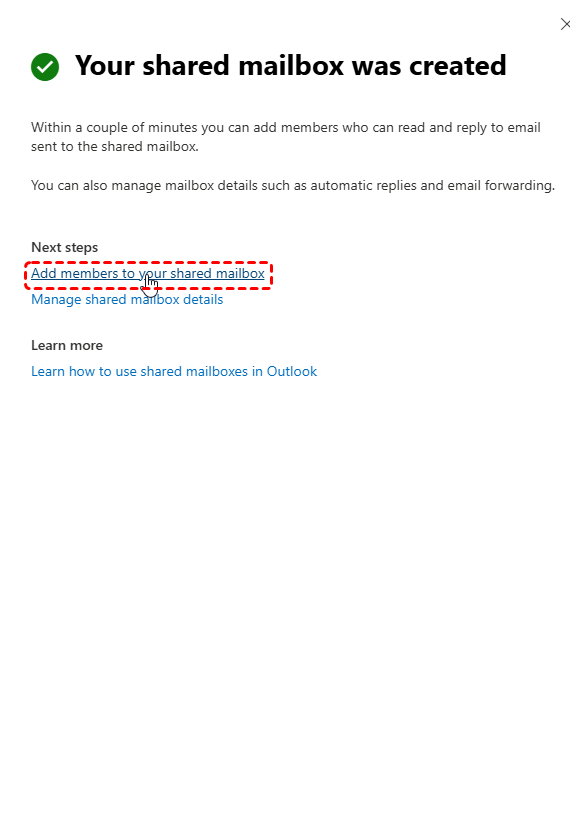
Step 5. Under "Next Step" section, select "Add members to this mailbox".
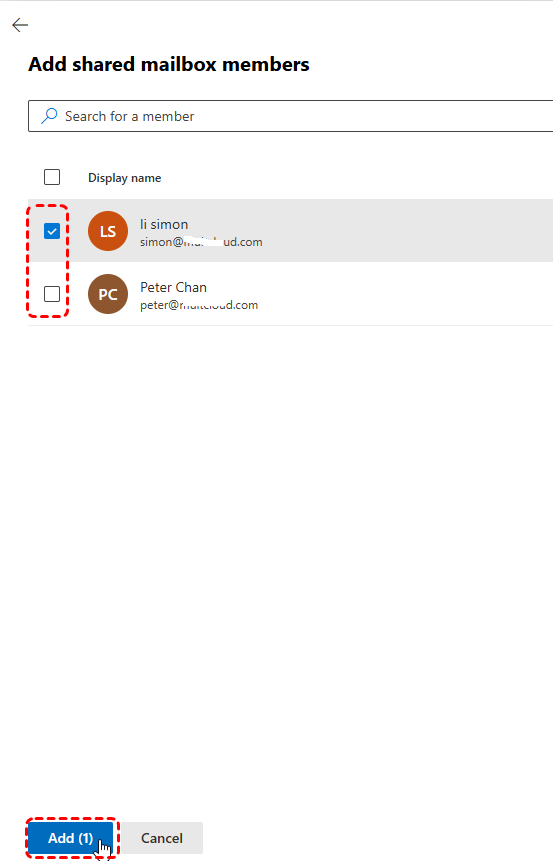
Step 6. Select the "Add members "button. Select the people who you want to use this shared mailbox, and then select "Add". and then close.
Part 2. Access and Open the Shared Mailbox
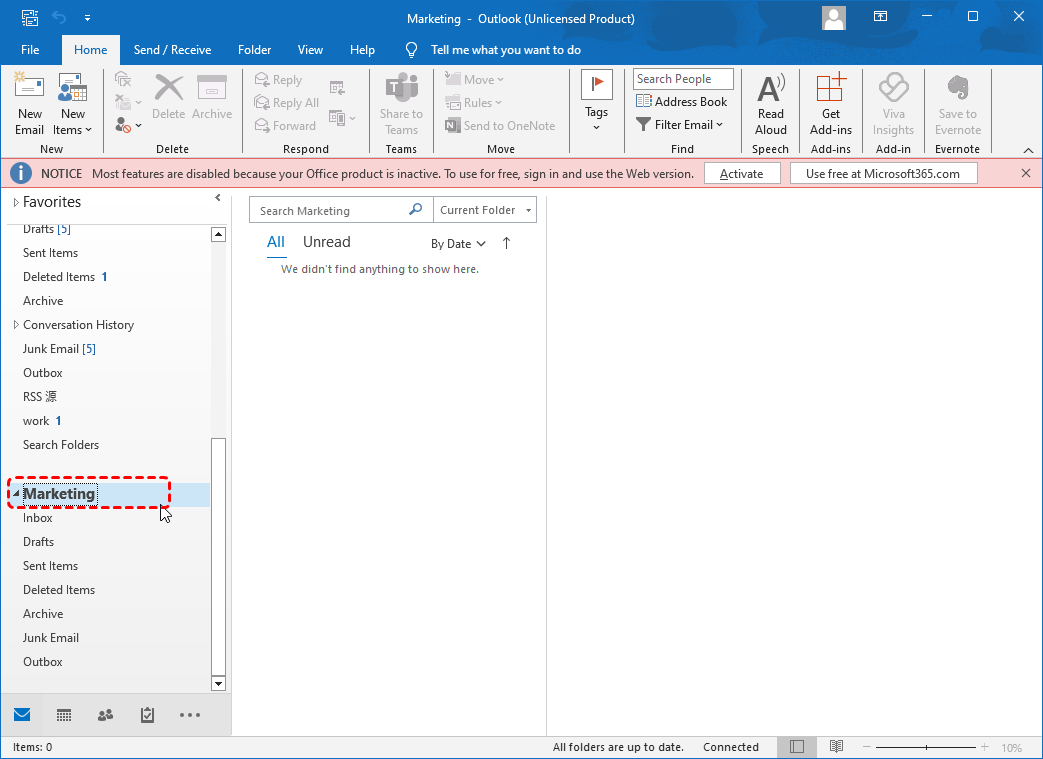
After your admin has added you as a member of a shared mailbox, you need to close and then restart Outlook. Then, you can see the shared mailbox will automatically appear in your Folder pane in Outlook.
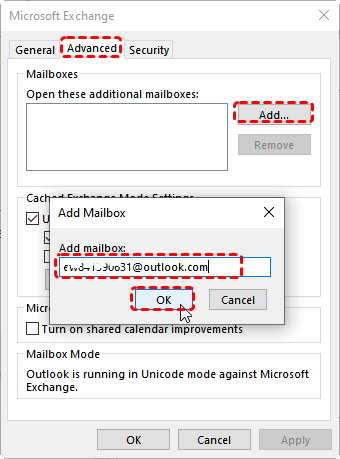
Generally speaking, it will take a few minutes before you can see the shared mailbox after your admin added you to a shared mailbox. If you wait a long time and get nothing, you can try manually adding the shared mailbox to your Outlook account:
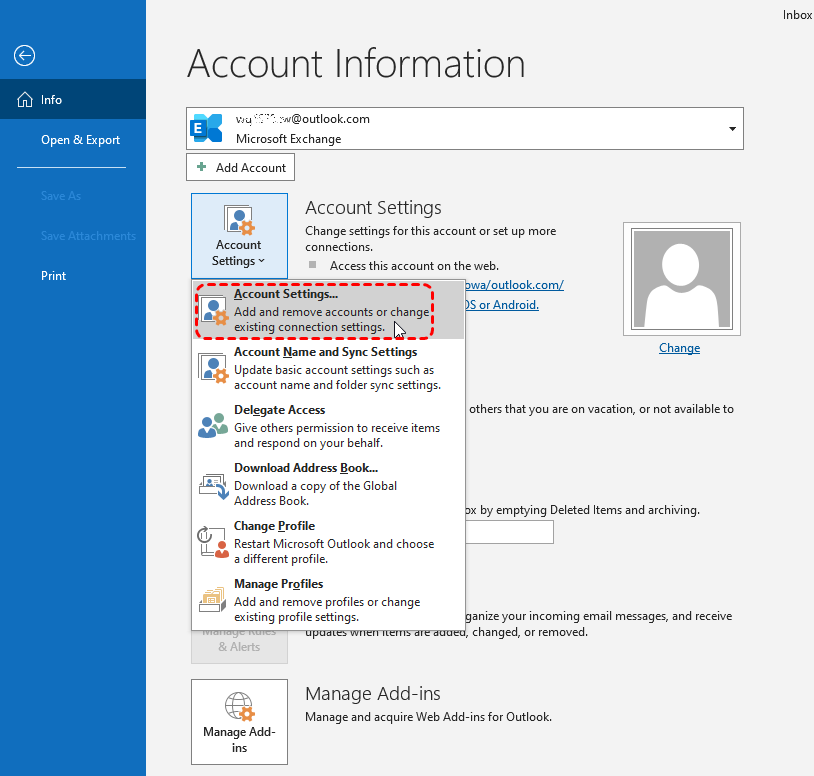
Step 1. Open Outlook. Select the File tab on the ribbon, then select "Account Settings" > "Account Settings."
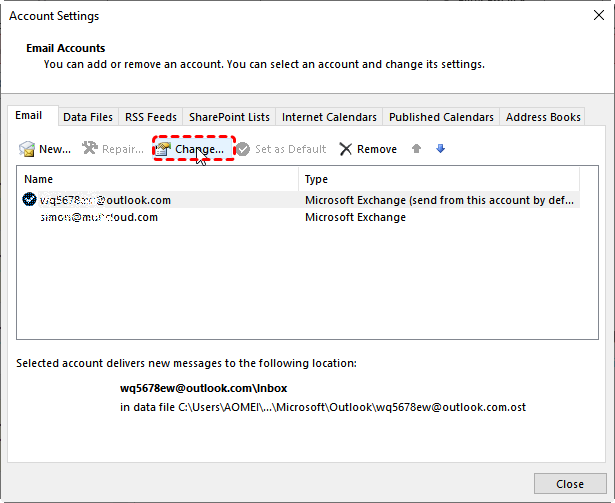
Step 2. Choose the Email tab. Tick the correct account and click on "Change."
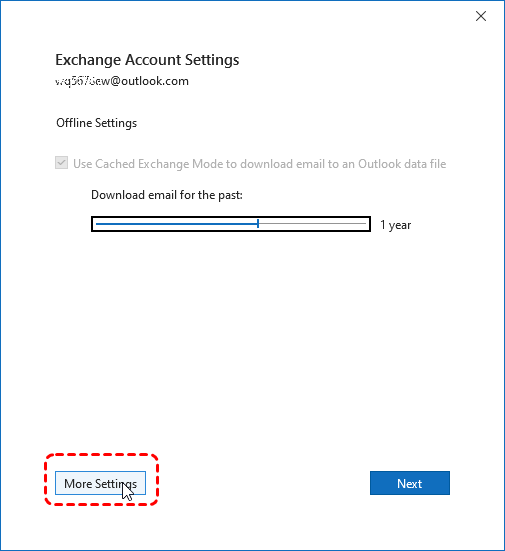
Step 3. Choose "More Settings" > "Advanced" > "Add".
Step 4.Type the shared email address.
Step 5. Choose "OK" > "OK".
Step 6. Choose "Next" > "Finish" > "Close".
Common Issues When Accessing Shared Mailboxes: How to Fix
While accessing shared mailboxes is generally straightforward, you might encounter some common issues:
- Permission Issues: Ensure that you have the necessary permissions to access the shared mailbox. If you're unable to access it, contact your IT administrator to verify your permissions.
- Incorrect Password: Double-check that you're using the correct Office 365 password to log in to your account.
- Outdated Outlook Version: Make sure you're using the latest version of Outlook to avoid compatibility issues.
- Incorrect Server Settings: Verify the server settings for the shared mailbox with your IT administrator.
Conclusion
Shared mailboxes can significantly enhance collaboration and efficiency within organizations. By understanding how to set up and access shared mailboxes in Outlook, you can streamline workflows, improve communication, and boost productivity. If you encounter any issues, don't hesitate to consult your IT administrator for assistance.
Bonus Tip: How to Manage and Back up Outlook Emails
This article addresses the question “how to open a shared mailbox in Outlook?”. If you’re considering backing up your Outlook, MultCloud can be extremely useful. Trusted by over 3 million users, MultCloud is a multi-cloud management tool that facilitates the transfer or synchronization of files between various cloud services.
For instance, you can save your Outlook emails as PDFs to your computer or cloud drives, such as Google Drive, OneDrive, or Dropbox, in bulk. MultCloud also enables you to access and manage all your cloud or Email accounts via a single application. Currently, it supports more than 30 different cloud services, including Google Drive, OneDrive, Dropbox, Box, Google Photos, iCloud Photos, FTP, WebDav, and more.

- Cloud Transfer: MultCloud can transfer files from one cloud service to another directly without downloading and re-uploading.
- Cloud Sync: With MultCloud, you can easily sync two folders between different cloud services in real-time.
- Cloud Backup: You can backup and restore data between different cloud services automatically.
- Instagram Downloader: MultCloud can help you download Instagram videos, photos, reels and stories to local device or remotely upload them to your clouds.
- Email Migration: You can directly back up and save Gmail emails as PDFs to your computer or cloud drive in bulk.
- Manage all cloud accounts in one place: Connect all your clouds to MultCloud and you'll find it so easy to access and manage multiple cloud storage files with a single login.
MultCloud Supports Clouds
-
Google Drive
-
Google Workspace
-
OneDrive
-
OneDrive for Business
-
SharePoint
-
Dropbox
-
Dropbox Business
-
MEGA
-
Google Photos
-
iCloud Photos
-
FTP
-
box
-
box for Business
-
pCloud
-
Baidu
-
Flickr
-
HiDrive
-
Yandex
-
NAS
-
WebDAV
-
MediaFire
-
iCloud Drive
-
WEB.DE
-
Evernote
-
Amazon S3
-
Wasabi
-
ownCloud
-
MySQL
-
Egnyte
-
Putio
-
ADrive
-
SugarSync
-
Backblaze
-
CloudMe
-
MyDrive
-
Cubby
