When is Scheduling Emails in Gmail Necessary
For professionals who rely heavily on Gmail for work, understanding how to schedule emails can be a valuable time-saving skill. Whether you need to send a message at a more convenient time for your recipient or want to plan out your email communications in advance, the scheduling feature offers a flexible solution. By mastering this technique, you can streamline your workflow and ensure your emails are delivered at the optimal time.
Scheduling emails in Gmail can be a valuable tool for various situations. Here are some scenarios where it might be particularly useful:
- Time Zone Differences: When communicating with people in different time zones, scheduling emails can ensure they are delivered at a convenient time for the recipient.
- Important Announcements: If you want to make an important announcement at a specific time, scheduling an email can guarantee it reaches your audience at the desired moment.
- Follow-Ups: Scheduling follow-up emails can help you stay organized and ensure you don't forget to follow up on important matters.
- Campaign Launches: If you're running an email marketing campaign, scheduling emails can help you space out your messages effectively.
- Personal Reminders: You can use Gmail's scheduling feature to send yourself reminders for appointments, tasks, or important events.
Can I Schedule a Gmail to Send Later?
Yes, you can schedule a Gmail to send later. Gmail provides a built-in feature that allows you to draft an email and then schedule it to be sent at a specific time. This feature is especially helpful for managing your email workflow and ensuring timely delivery of important messages.
How to Schedule an Email in Gmail
To schedule an email in Gmail, follow these simple steps:
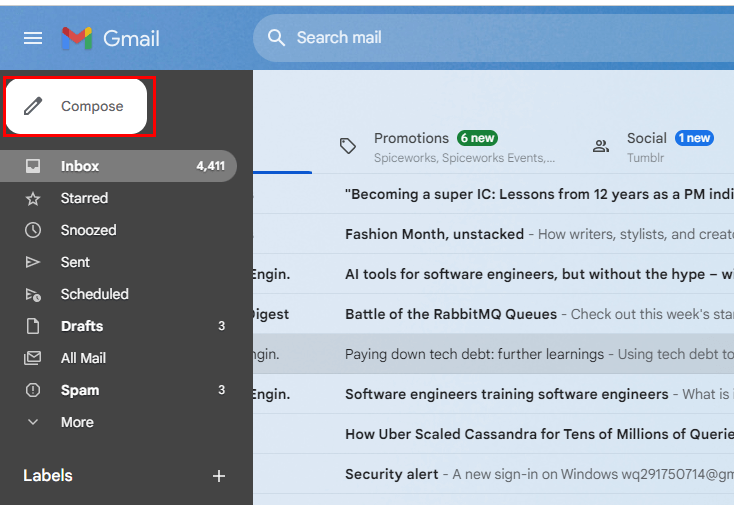
Step 1. Compose a new email: Start by drafting your email as usual.
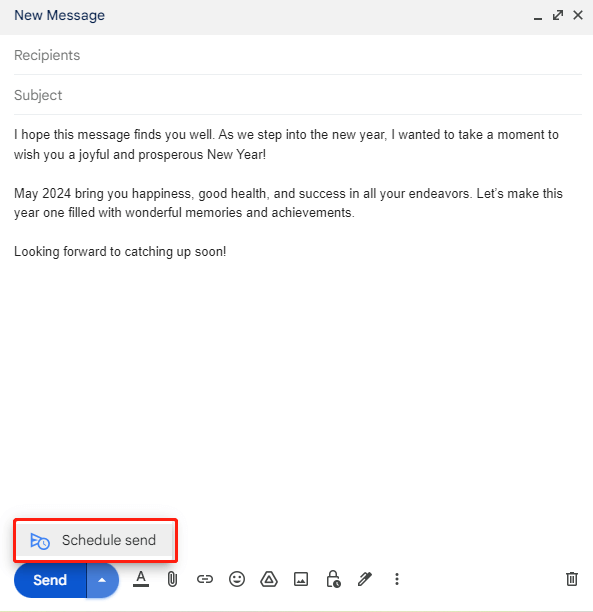
Step 2. Click the "Send" arrow: Instead of clicking the "Send" button immediately, click the small arrow next to it.
Step 3. Select "Schedule Send": From the drop-down menu, choose the "Schedule Send" option.
Step 4. Set the delivery time: Choose the date and time you want the email to be sent.
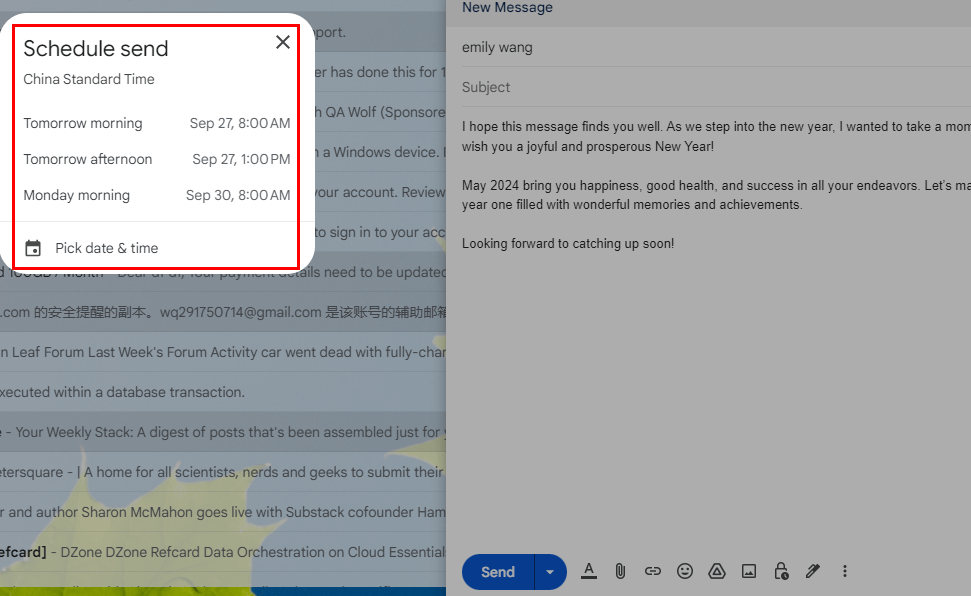
Gmail gives you a few default options:
- Tomorrow morning
- Tomorrow afternoon
- Monday morning
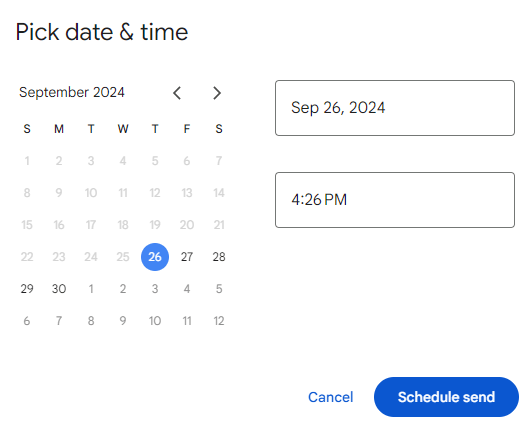
But you’re also free to select a completely different time slot if none of the default choices suit you. To do so, click on “Pick date and time”.
Step 5. Confirm: Click the "Schedule Send" button to confirm your selection.
Your email will now be saved in your Drafts folder and sent automatically at the specified time.
Bonus Tip: How to Change the Schedule Time
Need to make changes to your scheduled email? Want to add another recipient? Learn how to easily edit your scheduled emails in Gmail.
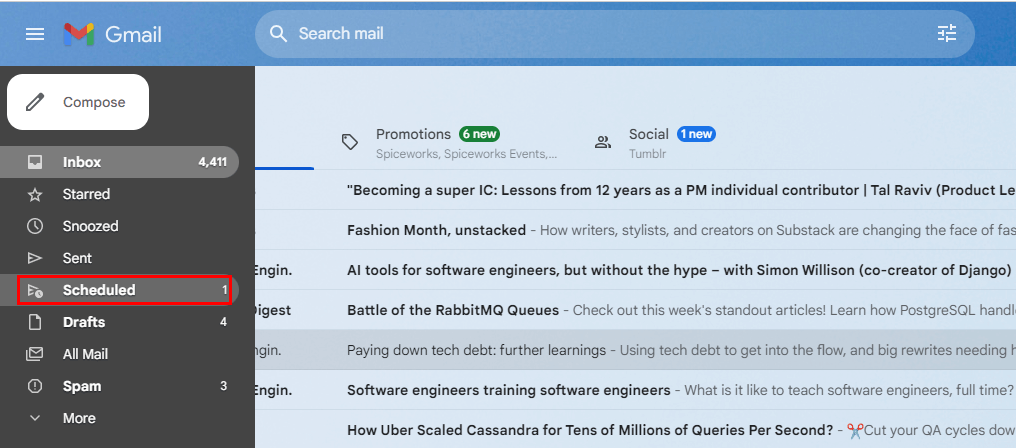
Step 1: Sign in to your Gmail account. Click on "Scheduled".
Step 2: Click on the scheduled email you want to edit.
Step 3: Once you’ve opened the email, click on "Cancel send".
Step 4: Edit your email (body, recipient or subject line, email signature )as you wish.
Step 5: Once done, click on the down arrow. And select "Schedule send" and choose the time again as you need.
Wrapping Up
Scheduling emails in Gmail is a convenient and effective way to manage your email workflow and ensure timely delivery of important messages. By following the steps outlined above, you can easily schedule your emails to be sent at any time you choose.
Important Gmail Email Backup & Migration Tool: MultCloud
While MultCloud is initially famous as a multiple cloud management tool, it has now released some new features like: Email Migration, Convert Webpage to PNG / PDF, or Download Images from Instagram, Google search and other websites.
For instance, you can save your Gmail emails as PDFs to your computer or cloud drives, such as Google Drive, OneDrive, or Dropbox, in bulk. MultCloud also enables you to access and manage all your cloud or Email accounts via a single application. Currently, it supports more than 30 different cloud services, including Google Drive, OneDrive, Dropbox, Box, Google Photos, iCloud Photos, FTP, WebDav, and more.

- Cloud Transfer: Move one cloud data to another without download and re-upload.
- Cloud Sync: Sync data across clouds seamlessly in real time.
- Cloud Backup: Dynamically backup and restore files between clouds.
- Share: Private and password protect share cloud data to others.
- Email Migration: Convert emails to PDF and save to local or even cloud.
- Automatic: Set up a schedule to make task automatically run as preferred.
- Offline: Transfer, sync or backup cloud data online without going through local.
- Efficient: Access and manage all your clouds with a single login.
MultCloud Supports Clouds
-
Google Drive
-
Google Workspace
-
OneDrive
-
OneDrive for Business
-
SharePoint
-
Dropbox
-
Dropbox Business
-
MEGA
-
Google Photos
-
iCloud Photos
-
FTP
-
box
-
box for Business
-
pCloud
-
Baidu
-
Flickr
-
HiDrive
-
Yandex
-
NAS
-
WebDAV
-
MediaFire
-
iCloud Drive
-
WEB.DE
-
Evernote
-
Amazon S3
-
Wasabi
-
ownCloud
-
MySQL
-
Egnyte
-
Putio
-
ADrive
-
SugarSync
-
Backblaze
-
CloudMe
-
MyDrive
-
Cubby
