Do you want to sync important or meaningful files to Google Drive but don't know how? No need to be panic! This post provides 4 easy and free ways to sync files or photos to Google Drive, so you can choose one way according to your needs!

Quick Search:

Google Drive is one of the most useful and simple cloud storage services that allows you to store various files such as documents, excel files, screenshots, videos, audio files, etc. Every user gets 15 GB of free storage by signing up. Syncing important files to Google Drive or other storage devices is an option for many users because of:
So, how to easily sync files or folders to Google Drive? Next, this article provides 4 common ways for your reference, namely using the Google Drive webpage, Drive for Desktop, mobile app and third-party tool. Now, you can read the following for details.
If you haven't installed Drive for desktop and don't plan to install it soon, you can take advantage of Google Drive on the web. The main way to do this is to manually upload files to Google Drive from your laptop. Let's take a look at the complete steps:
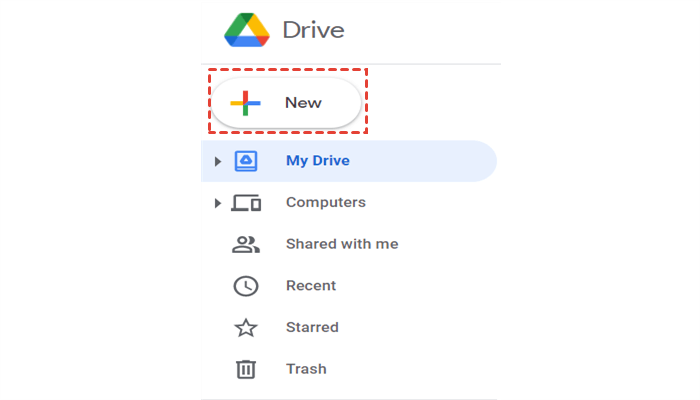
Step 1: Visit Google Drive on the web and sign in with your Google account. Step 2: Press the plus icon on the left and select the file according to your situation.

Step 3: Choose what to sync from your laptop to Google Drive. Alternatively, you can drag and drop files or folders from your laptop into Google Drive's interface.
Note: You should make sure that you only have a few files to upload and that your internet connection is stable enough when using this method. Otherwise, you may encounter the Google Drive upload stuck issue.
If you have Drive for desktop installed on your laptop, you can easily sync files from your laptop to Google Drive with this professional application. The following are the detailed operation steps.
Step 1: Launch Drive for desktop and log in with your Google account. Step 2: Press the gear icon in the upper right corner and select "Preferences".
Step 3: Then click "Add Folder" on the "My Computer" interface. Select the folders on your laptop to sync to Google Drive.
For users who use mobile phones frequently, backing up photos from mobile phones to Google Drive is an essential part. With the Google Drive mobile app, you can manually or automatically sync files and folders from your Android device to Google Drive. Please start syncing all documents stored on your phone by doing the following:
Step 1: On your Android phone, open the Google Drive app. Step 2: Click the "+" button. Step 3: Click "Upload". Then select images or files to upload in the pop-up window.
Notes:
Through the above operation methods, we know that the above 3 solutions all require you to operate manually. For users who need to sync files to Google Drive regularly, the above method may take a long time. If you need to sync data to Google Drive regularly, you can try the best free file sync software - AOMEI Backupper Standard.
Many users are using this tool due to its clean interface and reliable performance. No special technical knowledge skills are required to sync data from cloud drives, external hard drives, USB drives, and more. In addition, the tool provides other useful features such as email notification and scheduled sync. These features will bring you more convenience when you sync files.
Note: This tool is suitable for Win 11/10/8.1/8/7/XP system. And, you need to install the Google Drive app on your computer in advance.
Now, let's start using AOMEI Backupper Standard to automatically sync files to Google Drive.
Step 1: Free download AOMEI Backupper Standard, install and run the program, Step 2: On the main window, select Sync > Basic Sync.
Step 3: Click "Add Folder" to select files or folders to sync to Google Drive.
Step 4: Click the inverted triangle and click "Select a cloud drive". Then select Google Drive as the destination.
Notes:
Step 5: After the setup is complete, click "Start Sync" to sync local files to Google Drive.
To obtain and share files better or more securely, many users use a NAS to create a private cloud server. In this way, personal data storage and retrieval, home theater and game data backup can be easily achieved. But many users find it difficult to sync NAS and Google Drive data. Don’t worry! Online cloud-to-cloud sync tool - MultCloud can help sync NAS to Google Drive automatically.
Currently, MultCloud supports more than 30 leading clouds, including Google Drive, Google Workspace, Dropbox, Dropbox Business, OneDrive, OneDrive for Business, MEGA, pCloud and protocols such as FTP, WebDav. Of course, MultCloud also supports NAS.
The "Cloud Sync" function provided by MultCloud supports 3 main sync modes: "Real Time Sync", "One-way Sync", and "Two-way Sync". One-way Sync includes "Simple Sync", "Mirror Sync", "Move Sync", "Cumulative Sync", "Update Sync", "Incremental Sync", "Full Backup Sync". These sync modes can meet most of your needs.
Below are the detailed steps to sync files from NAS to Google Drive.
Step 1: Create a MultCloud account, it's free. Step 2: Log in to MultCloud and click the "Add Cloud" button to add your NAS account to MultCloud. Select your NAS among the cloud providers listed below, and authorize MultCloud to access your NAS account, and your NAS account will be added to MultCloud.
Step 3: Click Google Drive to add and follow the instructions to finish adding your Google Drive to MultCloud.
Step 4: Since you want to sync your NAS to Google Drive, click "Cloud Sync", select your NAS as the source, select Google Drive as the destination, click "Sync Now" and the process will begin.
Notes:
How to sync files to Google Drive? The 4 ways provided in this article can help solve it well. When you urgently need to sync files regularly, you can use the "Scheduled Sync" in AOMEI Backupper.
Also, if you need to sync data from your NAS to Google Drive, you can use MultCloud to help. Other features provided by MultCloud, such as Cloud Transfer, Team Transfer, Cloud Backup, and Remote Upload can also help you easily achieve cloud to cloud transfer and upload files to the cloud remotely.