Do you often encounter the "SharePoint files not syncing to OneDrive" problem? This article gives the best answer to solve your doubts. Also, the best tool can help you sync SharePoint files to OneDrive perfectly.

Quick Search:
"I'm currently using the OneDrive app to sync SharePoint and OneDrive, but one day I couldn't find a SharePoint file in OneDrive. I'm pretty sure I did a sync operation, does anyone know what's going on? How to solve it?”
This article will provide the following 8 common solutions, you can choose the appropriate one according to your needs. Alternatively, you can check out the best way to sync in the next section.
1. Check If You Have SharePoint Access
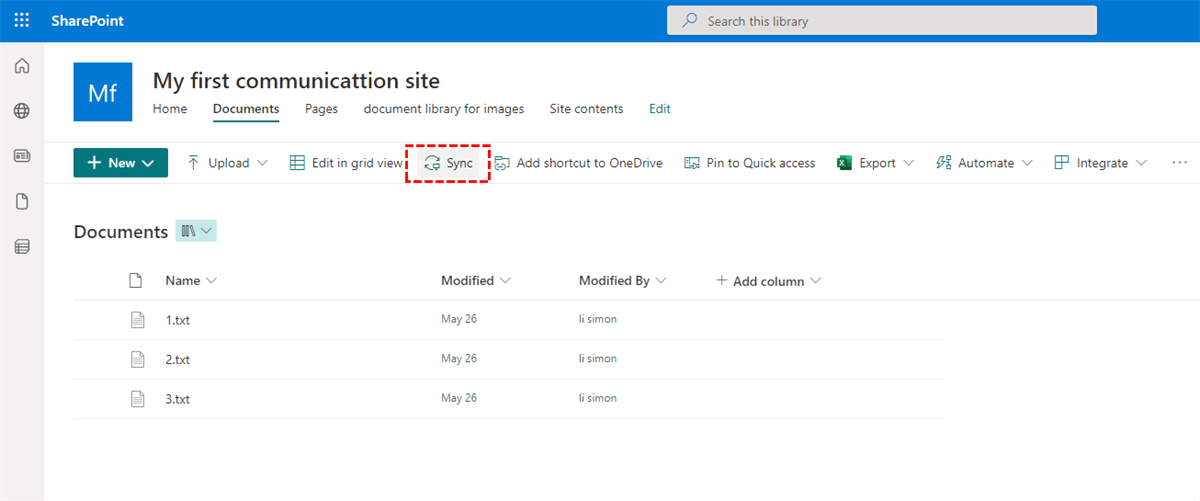
Step 1: Sign in to Office 365 with your work or school account. Then go to SharePoint.
Step 2: Select the document folder or library you are trying to sync.

If you don't see the "Sync" option, or if you see a pop-up that says "Which library do you want to sync?" Then you should contact the site owner to configure the site syncing.
Note: Page or site owners can edit through Library Settings > Advanced Settings > Offline Client Availability.
2. Keep OneDrive Up to Date
OneDrive and Windows are updated frequently, so you'll need to keep Windows and OneDrive up to date to resolve SharePoint sync issues.
Step 1: Download the latest version of Windows to get the most out of SharePoint in Microsoft 365. You should confirm that OneDrive Files On-Demand is enabled, which helps resolve sync issues.
Step 2: Download the latest version of OneDrive and install it.
Step 3: Press the "Start" icon, search for "OneDrive", and open the OneDrive desktop app.
Note: If it does, don't select OneDrive for Work or School, because it might still have an older version installed.
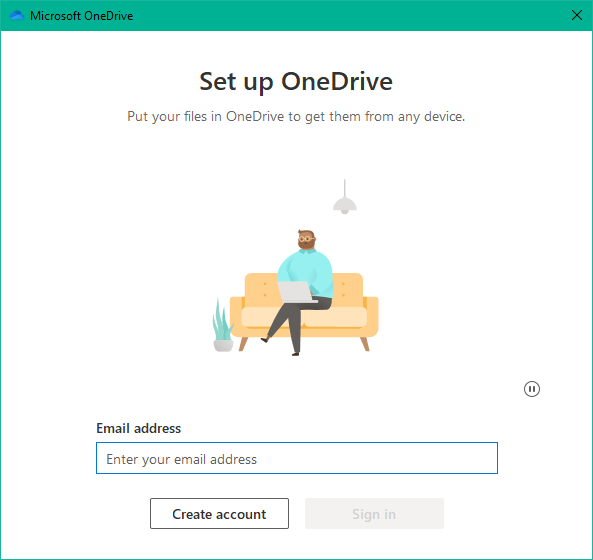
Step 4: When OneDrive setup starts, enter your SharePoint work or school account and then select "Sign in" to set up your account.

3. Stop and Reset the Sync Task
You can stop OneDrive from syncing on your computer and then restart the syncing task.
Step 1: Select the blue OneDrive icon in the notification area at the far right of the taskbar. Then click the nut icon to choose "Settings".
Note: If you can't find it, click "Start", type "OneDrive" in the search box, and then click OneDrive in the search results (not OneDrive for work or school, as it might be an older version).
Step 2: Find the location where the sync is not correct and click "Stop sync".
Step 3: Then sync SharePoint to OneDrive again.
4. Unlink OneDrive and Run OneDrive Again
In addition to stopping tasks that don't sync properly, you can also unlink OneDrive on your computer, which does not result in the loss of files or SharePoint data. You can always access your files online.
Step 1: Select the blue OneDrive icon in the notification area at the far right of the taskbar.
Step 2: Select the nut icon, and then click "Unlink this PC".
Step 3: Follow the steps in the "Welcome to OneDrive" guide to set up OneDrive.
5. Move Out Files that Are Not Needed Temporarily
If you see the sync icon stuck for a long time, moving some unwanted files out of the sync folder can help clear up any sync issues.
Step 1: Select the blue OneDrive icon.
Step 2: Select the nut icon >Pause sync... > 2 hours.
Step 3: Select certain files from one of your synced folders that don't need to be synced urgently, and then move them out of OneDrive.
Step 4: Select the nut icon > Resume syncing... again. Then move the files back when the sync is complete.
6. Comply with File Name and File Type Restrictions
Sometimes, the sync process can be affected by non-standard file names or file types, so you need to consider the following limitations:
7. Turn off Office Upload
If you're having trouble syncing Office files, the Office Upload cache system can interfere with SharePoint sync. So, you can try turning off the relevant setting in OneDrive.
Step 1: Select the blue OneDrive cloud icon. Then click the nut icon to select "Settings".
Step 2: Then select the Office tab and uncheck the "Use Office 2016 to sync open Office files that I open" check box.
Note: When you turn off the "Use Office 2016 to sync Office files that I open" setting, any changes that you and others make to Office files in SharePoint are no longer automatically merged.
8. Repair, Reinstall, or Update Office
Repairing or reinstalling Office can sometimes fix sync conflicts between Office and SharePoint. If you're still having sync issues, you can reset OneDrive.
Notes:
Step 1: Press the Windows key and R.
Step 2: In the running window, enter: %localappdata%MicrosoftOneDriveoneDrive.exe /reset. Then click "OK". After a minute or two, OneDrive will restart and start setup.
Using the above solutions can only temporarily alleviate the "SharePoint Sync not working" problem, or it will not solve your actual problem. To really avoid syncing not working, you can try a third-party cloud-to-cloud sync tool--- MultCloud. This tool can help you manage multiple cloud accounts and sync, transfer or backup data directly between accounts.
The following sections are the 4 steps to sync SharePoint to OneDrive.
Step 1. Create a MultCloud account.
Step 2. Log in to MultCloud and click the "Add Cloud" button to select the SharePoint you want to add. Grant MultCloud access to your OneDrive for Business account.
Step 3. Add OneDrive. Repeat the previous two steps to add OneDrive to MultCloud.
Note: You first need to distinguish whether the destination account is OneDrive or OneDrive for Business, and then select the corresponding icon to enter the addition process.
Step 4. Sync SharePoint to OneDrive through Cloud Sync. Click the "Cloud Sync" icon and select a site in SharePoint as the source and OneDrive as the destination. Then click "Sync Now" to sync from SharePoint to OneDrive.
Notes:
The above 8 solutions can alleviate or solve the "SharePoint Sync to OneDrive Not Working" problem. If that doesn't work, you can try a third-party sync tool --- MultCloud to sync your data automatically and in real time.