Do you feel hard to transfer photos from one library to another on Mac? Then, follow the instructions here! In this post, you will see the specific steps to do the transfer. Besides, if you also want to know how to move photos from one iCloud account to another, this post also offers a way.


Like many other users who raise the question of how to move photos from one library to another on Mac, you may also need to do the transfer because you want to organize all your photos together, back up photos to another library, or share photos with others. Here are some common reasons why transfer photos from one library to another on Mac.
If you are using macOS Monterey or later, you can easily move photos from one iPhone library to another on Mac by exporting and importing. But before the main steps, please make sure that the library you will import photos to does not have iCloud Photos turned on. After disabling iCloud Photos of the transfer destination, follow the steps:
Step 1. Open the library you want to move photos from on your Mac and choose your desired photos.
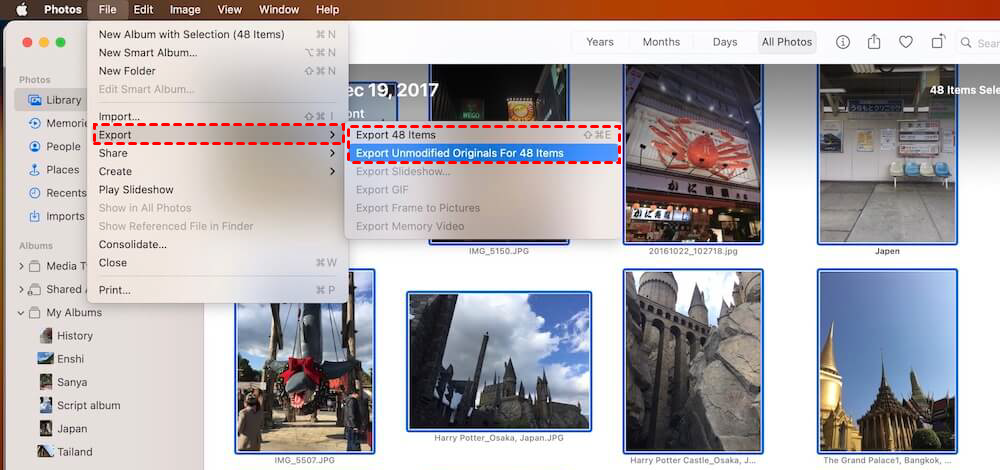
Step 2. Click File in the menu bar and choose Export to save the photos to a local drive or external hard drive. Here you can choose what photo kind, quality, color profile, and size you want to export with. You can also choose to retain some photo information like title, keywords, caption, or location.
Step 3. Open another library, click File in the menu bar, and choose Import. Then, choose the photos you exported before and click Review for Import.
Step 4. Choose Your Library in the Save to option and click the Import All New Photos button in the upper-right corner. Then, all the exported photos are saved in another library.
If you plan to move photos from one iCloud account to another or merge these 2 iCloud accounts, MultCloud comes to help. MultCloud is a free cloud management service on which you can manage different cloud storage services and accounts together. If you have multiple iCloud accounts, you can add them all to MultCloud and access documents or photos without switching login accounts.
Besides, MultCloud offers the Cloud Transfer function to help you easily transfer photos between iCloud accounts without photo downloading and re-uploading. Except for automating the transfer task, you can also customize it with the task scheduling and file filter options. You can refer to the following steps to create your own task:
Step 1. Go to MultCloud and click Get started for free to register for an account.
Step 2. Click Add Cloud and the iCloud Photos logo. Then, enter your iCloud login credentials in the blanks and go through the two-factor authentication to add an iCloud Photos to MultCloud. Also, repeat the operations to add another account.
Step 3. Tap Cloud Transfer in the left sidebar and choose the source and target iCloud Photos accounts.
Step 4. Open Options to check the transfer settings. Here you can also see the Email and Filter features. Moreover, if you want to schedule this task, you can open Schedule and set a preferred auto-start time. When everything is ready, click Transfer Now to start the photo transfer.
Note: If you have many photos that need to be moved to another account, you can consider subscribing to a paid plan to get more data traffic for transfer.
If you are a macOS Monterey or later user, you can follow the above guide on how to move photos from one library to another on Mac to easily reach your goal. You just need to export the photos from one library and then import them into another library. What’s more, if you want to move photos from one iCloud account to another, try MultCloud Cloud Transfer. It can help you directly transfer photos between clouds or accounts and manage multiple clouds and accounts altogether.


