Feeling confused when selecting specific folders to sync between Google Drive and your computer? Don’t worry, this article will help you to use Google Drive for desktop select folders to sync with computer in two best ways.

User Case: “After installing the new Google Drive application for the desktop on my computer. The app initially syncs my entire Google Drive with my computer. But what I want is to select folders to sync with Google Drive.”
With the 15 GB of free storage provided by Google Drive, you may have a large amount of data stored on your Google Drive. But even if your online storage space is unlimited after purchasing, your local device cannot offer that kind of empty storage for you.
However, you don't have to sync all your files between your computer and Google Drive cloud. Instead, you can use Google Drive’s selective sync feature to let Google Drive for desktop sync selected folders with the computer.
According to Google, two of its desktop applications, Google Drive File Stream and Backup and Sync, have been merged into a single new product, Google Drive for desktop, which provides excellent features that have been highly valued by Google Drive users.
Using Google Drive for desktop selective sync function is a great way to achieve Google Drive one way sync data across multiple platforms like Mac, Windows, and even mobile devices. In some cases, you may not want to sync all your data on a single platform even though the app is convenient and secure.
But now, you can select which folders should be synced to a device or the cloud. That is to say, you can sync some files and folders to your computer and leave others only in the cloud. And you can select certain folders to sync to Google Drive as well. The instructions below will show you the detailed operation of how to sync specific folders with Google Drive in 2 easy ways.
The operations of how to sync a specific folder with Google Drive are the same whether you use the Mac or Windows 11/10 systems in daily life. So, you can feel free to follow the steps below to easily use Google Drive for desktop select folders to sync with your computer.
Step 1. Download and install the Google Drive for desktop app on your computer. Step 2. Click the Google Drive icon in the taskbar to sign in to the app with your Google account. Step 3. Click the gear icon in the pop-up window to open the “Preferences” from the dropdown menu.
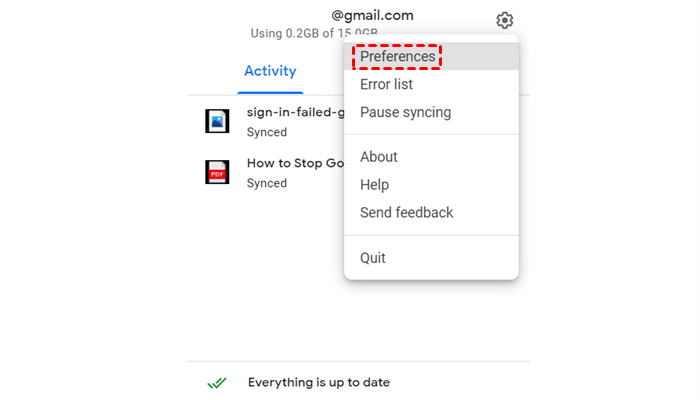
Step 4. On the “My computer” page, click “Add folder” to select specific folders that you want to sync from your computer to Google Drive. Then click “Done” and “Save” the settings.
Step 1. In the pop-up window of Google Drive Preferences, switch to the “Google Drive” page. Step 2. Make sure your Google Drive sync mode is “Stream files”.
Step 3. Click “Open in Explorer” in the pop-up window to open your Google Drive folder on the computer. Step 4. Select the files and folders that you don’t want to sync from Google Drive to your computer and right-click your selection. Step 5. Click Offline access > Online only in the pop-up menu.
Except for selecting folders to sync Google Drive with a computer, which may still take up some of your local storage and your files can still be easily accessed by others, you can also learn how to select folders to sync Google Drive to another cloud drive account or sync 2 Google Drive accounts easily with a single click. In this way, you can put double security on your Google Drive files while saving your local storage without installing anything.
All you need is a professional web-based multiple cloud storage manager named MultCloud.
If you want to sync Google Drive with another cloud most securely and efficiently, then the Cloud Sync function of MultCloud is great for you to try. Here we will show you how to sync files from one Google Drive account to another as a brief example.
Step 1. Create a MultCloud account on the official website and log in.
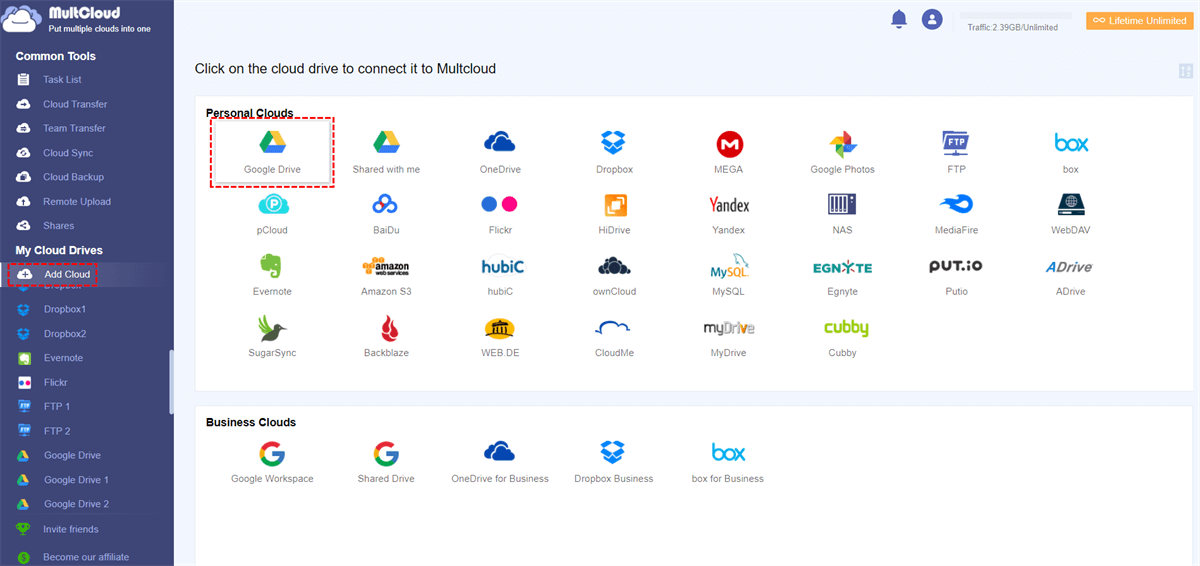
Step 2. Click the Google Drive icon and choose one of your Google Drive accounts to add to MultCloud. Step 3. Click “Add Cloud” and click the Google Drive icon again to add another Google Drive account to MultCloud as well.
Tips:
Step 4. On the “Cloud Sync” page, select the files and folders in one of your Google Drive accounts as the source. Step 5. Select another Google Drive account or a folder in it as the destination.
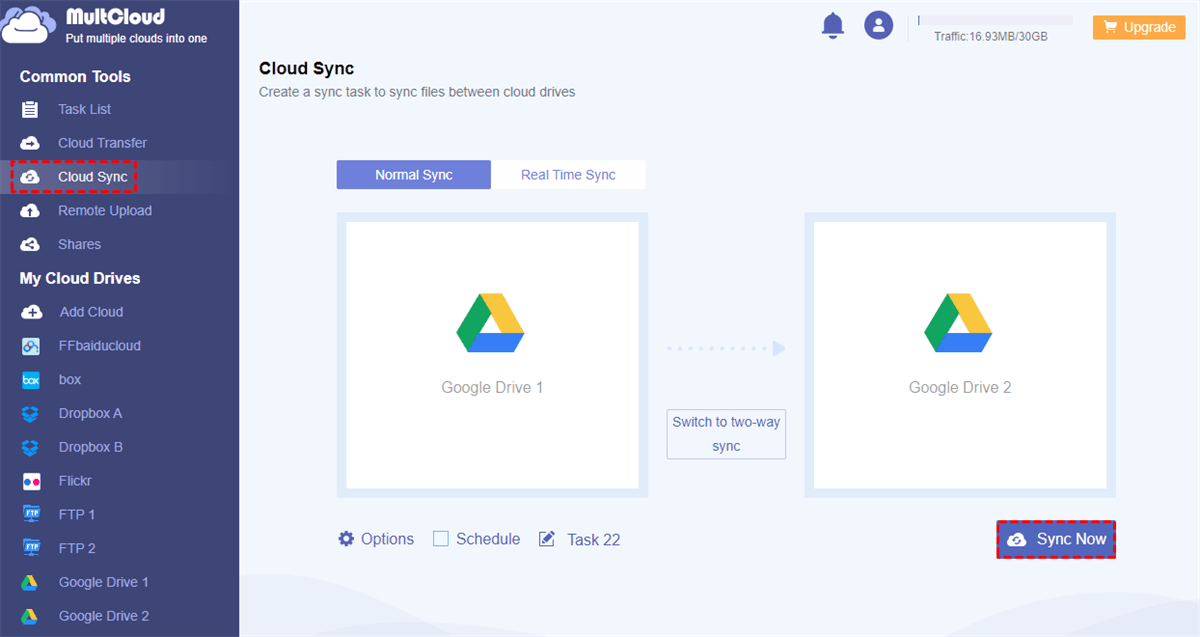
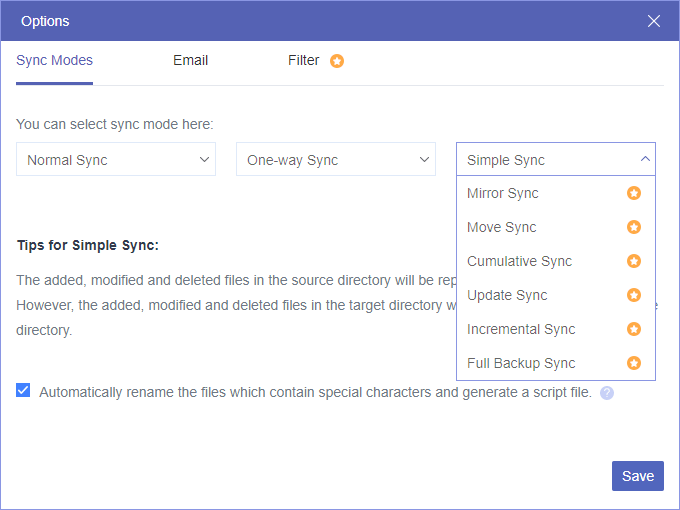
Step 6. Click “Options” to choose a sync mode you need and click “Save”.
Tips:
Step 7. Click the purple button “Sync Now” and MultCloud will immediately sync your selected folders between Google Drive accounts.
Tips:
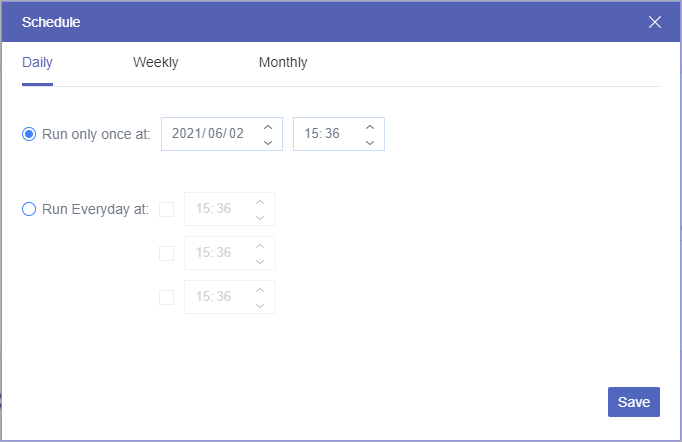
Similar to Dropbox desktop sync, the way to achieve Google Drive selective sync is so easy that you can choose one of the above methods to quickly select folders to sync Google Drive with a computer without causing any error. And if your computer is already crowded with files, then the bonus tip about syncing Google Drive files to another cloud would be so helpful for you.