Unlock cloud efficiency with selective sync! Learn how to choose specific files or folders to sync, saving space and improving access speeds. In this way, you can streamline your workflow and optimize storage. Meanwhile, we will show you how to selective sync across cloud services directly and efficiently.

Quick Search:
Selective Sync is a feature that lets you choose specific folders to sync to your local devices, and vice versa. Basically, many major and popular cloud drives offer this feature, making it more efficient to manage different kinds of data offline/online. In this article, we will introduce OneDrive and Dropbox selective sync for your reference.
Does OneDrive have selective sync? Of course, yes! OneDrive selective sync allows you to select specific folders to sync to the cloud. This can help users save disk storage space since they can keep essential files offline while still providing access to all files through the cloud. Users have the option to modify their selective sync settings to add or remove folders from local storage as needed.
Here’s how:
Step 1: Install OneDrive desktop app on your computer.
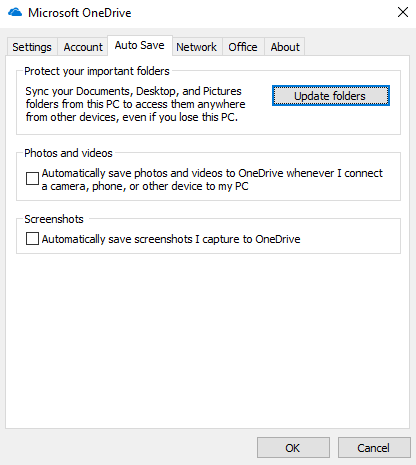
Step 2: Sign into your account, head to Settings > Auto Save > Upload folders.
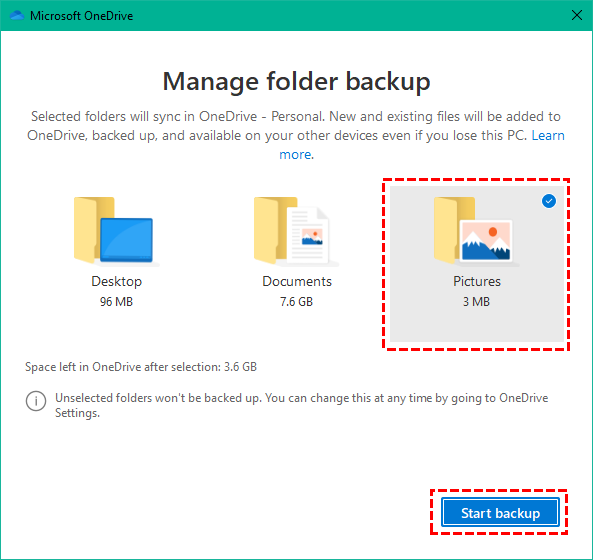
Step 3: Select the specific folder you want to sync. Check it and tap the Start backup button.
Similarly to OneDrive, you can enable Dropbox selective sync as well. To enable this feature, follow the steps below:
Step 1: Download and install Dropbox on your device.
Step 2: Log into your account and tap the avatar image > Preferences > Sync > Selective Sync > OK.
Step 3: Select which folders to keep on your computer by ticking the checkbox. Folders that aren't chosen won't be synced to your local computer, but will still exist on Dropbox cloud. After that, hit the Update button.
We have shown you how cloud selective sync works on Dropbox and OneDrive. Now, you have a clear understanding of this feature overall. After knowing how to selectively sync folders from local to the cloud and vice versa, it is time to learn how to make selective sync across cloud drives. There are many clouds in the market, and syncing data between each other is essential.
In this situation, MultCloud can help you a lot. It is a smart and professional cloud sync service that supports a variety of cloud drives in the market. Unlike the downloaded-and-upload solution, MultCloud makes it easy to sync folders between cloud drives directly on the web. This way, your data can always be up-to-date on different cloud drives.
MultCloud provides you with many benefits, for example:
✅ Automatic Sync: Scheduled syncing tasks are available on MultCloud. There are 4 scheduled options you can choose from, including syncing at a specific time, daily, weekly, or monthly.
✅ Real-Time Sync: MultCloud allows you sync data between cloud storage services in real time, helping maintain consistency and up-to-date information across cloud services, enhancing collaboration and productivity.
✅ Offline Sync: MultCloud relies on data traffic to sync data between cloud services. Once you start the process, you can shut your computer and the task will be continued.
✅ Selective Sync: You have the option to choose specific folders to sync or sync the whole cloud. By using the Filter feature, you can quickly include files with certain extensions.
Now, let’s figure out how to sync Google Drive with OneDrive free via MultCloud:
Step 1: Create an account for free. If you don’t want to register new accounts, log in directly with your Google, Facebook, or Apple ID.
Step 2: Head to Add Cloud on the left side. You will see how many cloud drives MultCloud supports. Tap the icon of Google Drive to add your account and permit MultCloud. Next, use the same way to add OneDrive.
Step 3: Tap Cloud Sync on the left pane. Now, choose specific folders from Google Drive as the source cloud and OneDrive as the target cloud. Finally, tap the Sync Now button.
There are many syncing methods to choose from, such as Move Sync, Cumulative Sync, Update Sync, Mirror Sync, and so on. Anyway, no matter whether it is one-way or two-way sync, MultCloud can meet your requirements. Meanwhile, the intuitive interface of MultCloud makes it easy for you to set up and manage sync tasks, even without advanced technical knowledge.
In addition to syncing files and folders across cloud drives, you are able to migrate and back up data between cloud drives as well. Similarly, you can enjoy the quickest speed when performing the migration process. If you are a paid user, you can enjoy 10 threads of data transfer; if you are a free user, then you can enjoy those 2 threads.
Cloud Transfer: Data can be moved between cloud services efficiently without going through a manual download-and-upload process. MultCloud is reliable and practical, so you can transfer files between cloud drives with confidence.
Cloud Backup: By backing up data across clouds, you can create backups so that data loss is no longer a nightmare. After backing up, you can restore data efficiently and seamlessly via MultCloud.
Remote Upload: To download study materials from URLs, torrent files, and magnet links, you can enable this feature to download them directly. The only thing you should do is to enter the link. Then MultCloud will do all the rest. For instance, you can download directly to Google Drive.
After reading the article, you now know what is cloud selective sync and how to set up select sync on major cloud drives. Meanwhile, when you want to sync data between cloud drives, you can turn to MultCloud, a useful cloud file manager. This service makes the sync process a breeze, saving time and improving efficiency.
As an outstanding cloud file manager, MultCloud enables you to transfer, sync, and back up files and folders between cloud drives without any effort. If you are using multiple cloud drives, MultCloud offers a direct and convenient way to organize them together. Apart from the features mentioned above, basic features are supportive, including downloading, uploading, sharing, etc.


