Are you tired of worrying about losing your valuable Dropbox data? Learn how to effortlessly transfer your files to iDrive for secure backup. Our step-by-step guide will show you how to quickly and easily backup from Dropbox to iDrive, ensuring your data is always protected.

Quick Search:
Before plunging into the backup techniques, let us briefly introduce Dropbox and iDrive.
What is Dropbox?
Dropbox is a cloud-based file storage solution that enables an individual to store their documents in any part of the world on condition that it has access to the Internet. It is a very popular tool used for personal as well as professional reasons with features such as file sharing, version controls and integration with some of the leading productivity Apps.
What is iDrive?
In contrast, iDrive is a different company that specializes in providing backup services as well as disaster management plans. It offers services like ongoing data protection, synchronization of files with respect to different devices used by its users and encoding technology that ensures privacy of customer information.

The backup of your Dropbox data to iDrive comes with various advantages:
Benefits of Backing Up Dropbox
Advantages of Using iDrive
Can I back up my Dropbox folder to iDrive? Yes! The most straightforward approach to backing up Dropbox to iDrive is through a manual transfer. Here's a step-by-step guide:
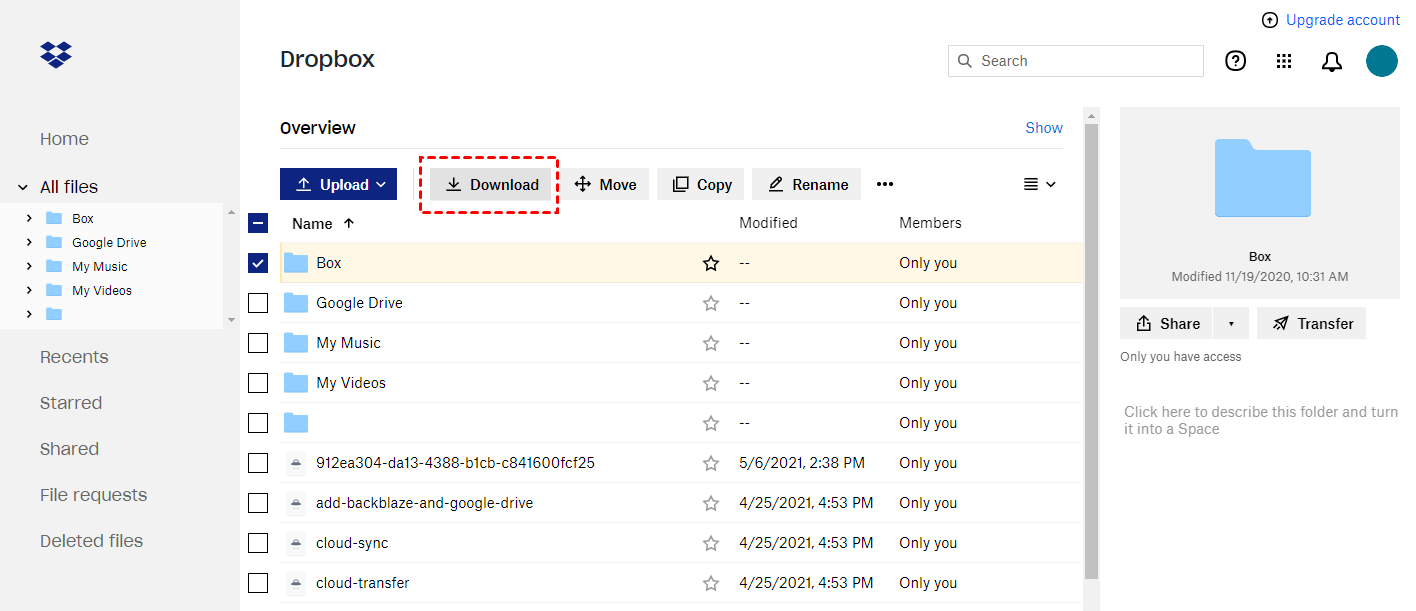
1. Download Files from Dropbox: Log in to your Dropbox account and download the files or folders you want to back up to your computer.

2. Upload Files to iDrive: Create a new folder in your iDrive account and upload the downloaded files.
While this method is simple, it can be time-consuming for large files or numerous folders.
Dropbox's Selective Sync feature allows you to choose specific folders to sync with your computer. You can then use a third-party tool or manually upload these synced folders to iDrive. Here's how to set up Selective Sync:
1. Open Dropbox Settings: Click on your profile picture in the Dropbox app and select "Settings".
2. Choose Folders to Sync: In the "General" tab, find the "Selective Sync" section and click "Choose folders".
3. Select Folders: Check the boxes next to the folders you want to sync.
4. Sync with iDrive: Once the selected folders are synced to your computer, you can upload them to iDrive using the manual transfer method or a third-party sync tool.
For a more automated and efficient backup solution, consider using a third-party backup tool, such as MultCloud. It can automatically backup files between Dropbox and iDrive, eliminating the need for manual transfers.
Below are the detailed steps to complete Dropbox to iDrive backup using MultCloud.
1. Create a MultCloud Account: If you haven't already, sign up for a MultCloud account.
2. Add Dropbox and iDrive: Connect both your Dropbox and iDrive accounts to MultCloud.
3. Set Up Automatic Backup: Choose the "Cloud Backup" feature, select "Dropbox" as the source and "iDrive" as the destination. Configure the backup settings (e.g., frequency, file types) as needed.
4. Start Backup: Once you've set up the backup, MultCloud will automatically start backing up your Dropbox files to iDrive based on your chosen settings.
Additional Tips for a Successful Backup
As a professional cloud file manager, MultCloud not only supports cloud-to-cloud data backup, but also supports the following popular features:
Backing up your Dropbox data to iDrive is a crucial step in safeguarding your valuable information. By following the methods outlined in this article, you can easily and effectively transfer your files, ensuring they remain secure and accessible. Whether you choose manual transfer, Selective Sync, or a third-party sync tool, the important thing is to establish a reliable backup routine that suits your needs.