Discover how to turn off autoplay in YouTube and take back control of your viewing experience. This guide shows how to stop autoplay videos on YouTube, disable the autoplay feature, and adjust settings for a smoother browsing experience.

YouTube's autoplay feature, a convenient function for some, can often become a source of distraction. It automatically initiates the playback of the next video in a queue or related videos, potentially leading to hours of unintentional viewing. If you're aiming to regain control over your YouTube experience, this guide will provide you with the necessary steps to disable autoplay across various platforms.
The autoplay feature can significantly disrupt your workflow or relaxation time. It has the potential to lead to mindless scrolling and excessive video consumption, making it challenging to concentrate on other tasks. Additionally, it can contribute to increased data usage, especially on mobile devices with limited data plans.
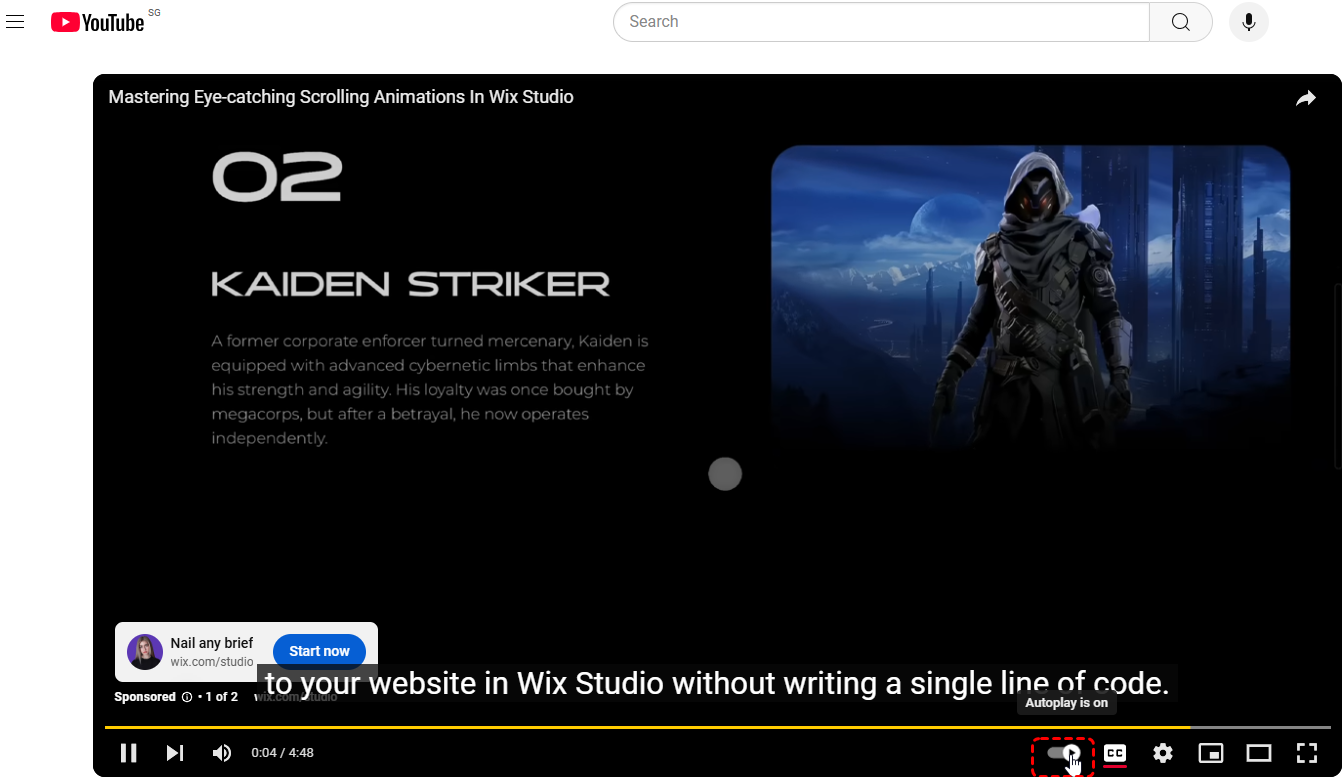
Disabling autoplay on the YouTube desktop site is a straightforward process:
Step 1. Log in to YouTube on a web browser on your PC.
Step 2. Go to any YouTube video you wish to view.
Step 3. Locate the autoplay switch, which is enabled by default, near the bottom of the YouTube video next to the CC (Closed Captions) button.

While the process is generally similar across Android and iOS, there are slight variations in the settings menu.
Step 1. Open the YouTube App: Launch the YouTube app on your Android device.
Step 2. Access Settings: Tap your profile picture located in the top-right corner and select "Settings."
Step 3. Disable Autoplay: Scroll down to the "General" section and toggle off the "Autoplay next video" option.
Step 1. Open the YouTube App: Launch the YouTube app on your iOS device.
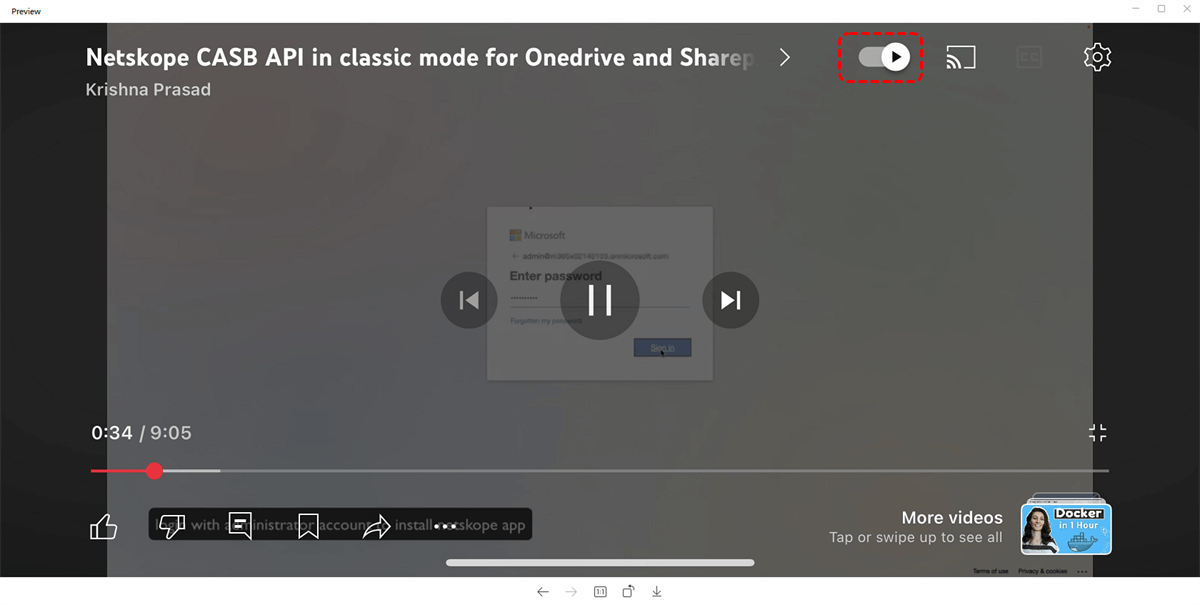
Step 2. Play the Video: Find and play a video.
Step 3. Disable Autoplay: In the top right corner of the screen, toggle off the "Autoplay" option.

Moreover, you can use the Setting to turn off the autoplay:
Step 1. On the YouTube app, tap your profile picture in the top-right corner and click on "Setting".
Step 2. Navigate to Settings menu, then choose "Playback".
Step 3. Turn off the "Autoplay Next Video" feature.
While the specific steps may vary depending on your TV's operating system and YouTube app version, the general approach involves navigating to the app's settings and disabling the autoplay feature. Consult your TV's user manual or the YouTube app's help section for detailed instructions.
In summary, on most smart TV, you can take the following steps to turn off the Autoplay:
Step 1. Launch the YouTube app on your Smart TV.
Step 2. Click on your profile icon in the top right of the screen, then navigate to reveal the settings menu.
Step 3. Search for the "Autoplay" setting then toggle it off using your TV remote. All done.
By following these outlined steps, you can effectively disable the autoplay feature on YouTube, allowing you to regain control over your viewing experience. Whether you're using a desktop computer, a mobile device, or a smart TV, taking the time to turn off autoplay can help you stay focused and avoid unintentional video binges.