In this guide, learn how to create a survey in Outlook email, Outlook 365, and web. Discover the straightforward steps to set up surveys, send them to your recipients, and track responses for a seamless experience. This guide will help you use Outlook effectively for gathering valuable feedback.

While Outlook is primarily an email client, it offers versatile tools for creating and managing surveys. Whether you're using the desktop version, Outlook 365, or Outlook Web, you can leverage its features to gather feedback and insights from your contacts.
While Outlook doesn't have a dedicated survey tool, you can create basic surveys directly within email messages through the "voting buttons". Here's how:
Step 1. Open Outlook and create a new mail message by clicking on the "New E-Mail" button at the top on the Home tab.
Step 2. On the "Options" tab, in the "Tracking group", click "Use Voting Buttons".
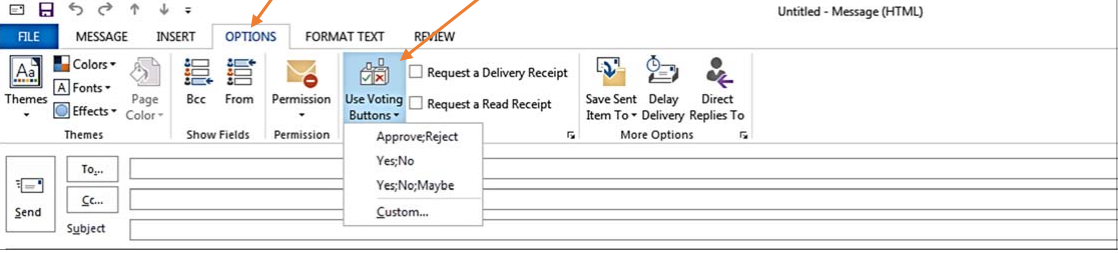
Step 3. Choose one of the following:
| Response Type | Use Case |
|---|---|
| Approve;Reject | When you need a clear authorization or disapproval for a specific action or proposal. |
| Yes;No | When a simple binary choice is required, such as agreeing or disagreeing with a statement. |
| Yes;No;Maybe | When you want to offer more flexibility in responses, allowing for uncertainty or neutral opinions. |
| Custom | When you need specific, tailored response options that fit the unique context of your survey or poll. |
Once the survey is ready, send it to your target audience. Consider using a clear and concise subject line that accurately reflects the survey's purpose. Keep an eye on your inbox for incoming replies. You can use Outlook's search and filter features to organize and track responses efficiently.
Limitations: While this method is simple, it can be time-consuming for large-scale surveys, and data analysis may require additional tools. Manually analyzing responses can be tedious and error-prone.
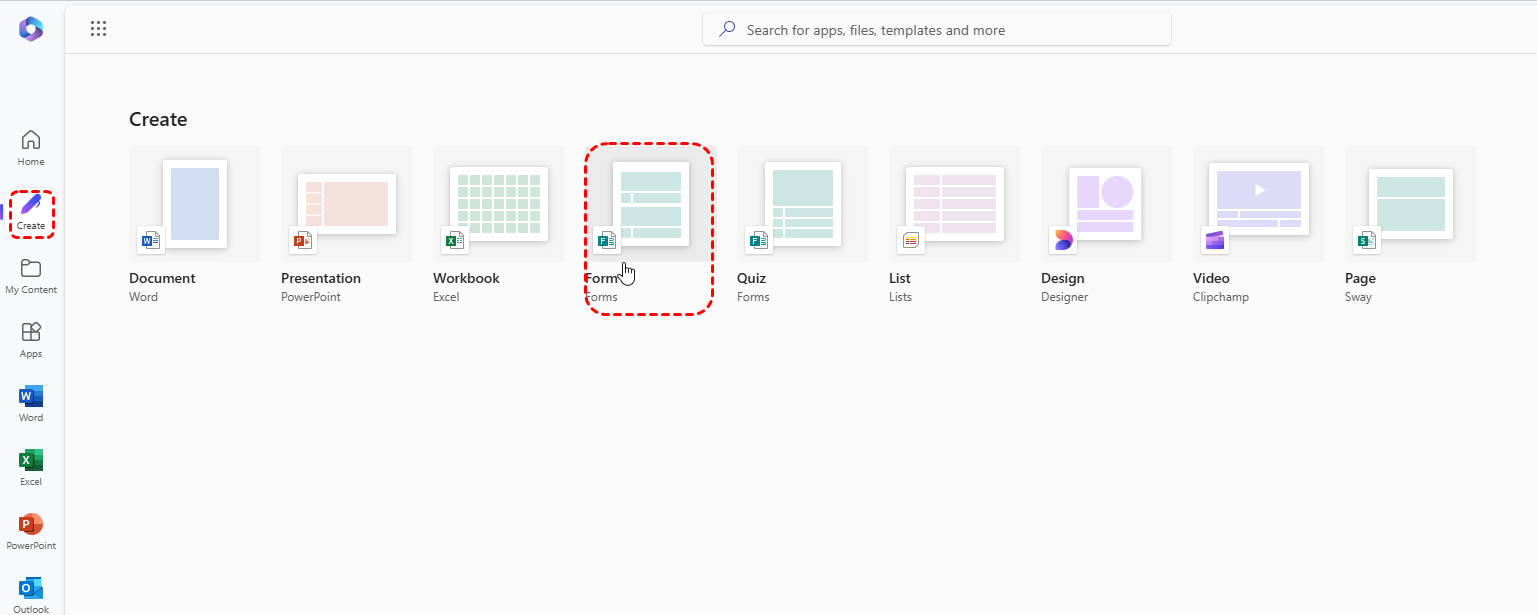
Microsoft Forms is a powerful tool for creating surveys, quizzes, and polls. Here's how to integrate it with Outlook 365:
Step 1. Create a New Form: Access Microsoft Forms and start a new form.
Step 2. Describe your survey: Title your form and, if you want, add a description of it.
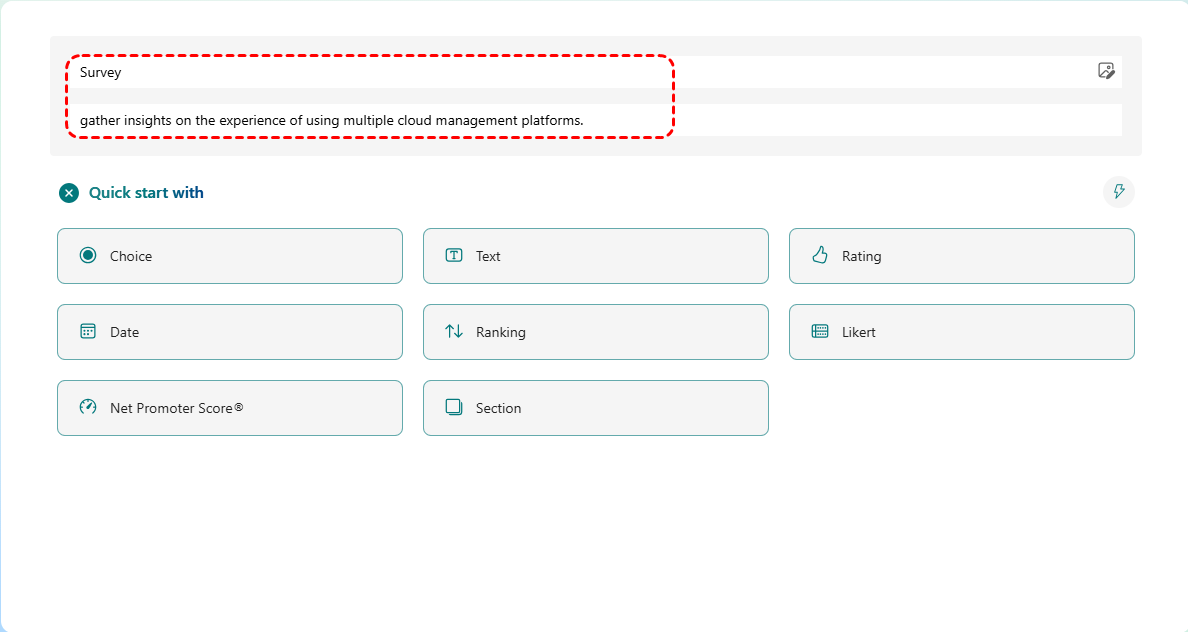
Step 3. Add Questions: Customize your survey with various question types like multiple-choice, Likert scale, rating scale, open-ended, and more. You can also add images, videos, and other multimedia elements to enhance engagement.
Step 4. Design Your Form: Choose a theme, add a title and description, and customize the layout to create a visually appealing and professional survey.
Step 5. Share the Survey: Once done, click on the "Collect response" button in the top-left corner. In the pop-out window, you can share the survey by link, or embeding it in email or by social media.
As respondents submit their answers, the data is automatically collected in Microsoft Forms. You can track responses in real-time to monitor progress.
Similar to Outlook Desktop, you can create basic surveys in Outlook Web using the email editor. Here's how:
Step 1. Compose a New Email: Draft a new email to your target audience.
Step 2. Format Survey Questions: Use numbered lists or bullet points to present your questions clearly and concisely.
Step 3. Provide Response Options: Clearly outline the response options for each question, ensuring they are mutually exclusive and cover all possible responses.
Step 4. Include Instructions: Provide clear instructions on how respondents should submit their answers, whether it's by replying to the email or using a specific survey tool.
Step 5. Send the Survey: Send the email to your target audience.
Step 6. Monitor Responses: Check your inbox for incoming replies. You can use Outlook Web's search and filter features to organize and track responses efficiently.
While Outlook offers built-in features for basic surveys, you can leverage free online tools to enhance your survey creation process:
By combining the power of Outlook and these free tools, you can effectively create, distribute, and analyze surveys to gather valuable insights from your audience.
This article addresses the question “How to create a survey in Outlook?”. If you’re considering backing up your Outlook, MultCloud can be extremely useful. Trusted by over 3 million users, MultCloud is a multi-cloud management tool that facilitates the transfer or synchronization of files between various cloud services.
For instance, you can save your Outlook emails as PDFs to your computer or cloud drives, such as Google Drive, OneDrive, or Dropbox, in bulk. MultCloud also enables you to access and manage all your cloud or Email accounts via a single application. Currently, it supports more than 30 different cloud services, including Google Drive, OneDrive, Dropbox, Box, Google Photos, iCloud Photos, FTP, WebDav, and more.


