Feeling lost on how to add Dropbox to your Mac Finder? Don't worry, we've got you covered! This easy-to-follow guide walks you through the process step-by-step. Learn how to access your Dropbox files directly from Finder and streamline your workflow. No more switching between apps!

Exchanging back and forward between Dropbox and your Mac organizers can appear like an efficiency deplete. Flipping between apps all the time ruins your efficiency and moderates you down. In any case, what if you seem to effortlessly get to your Dropbox records from the Discoverer on your Mac? Well, stop worrying! This comprehensive tutorial explains how to integrate Dropbox with your Mac Finder so you can access your online storage immediately and organize your workflow more efficiently.
Imagine being able to handle your Dropbox files on your Mac just as easily as any other folder. Adding Dropbox to Finder opens up a wealth of advantages:
It's really easy to add Dropbox to your Mac Finder. Here are two easy ways that you can select from:
If you already have the Dropbox desktop application installed on your Mac, this method works perfectly. Here's a detailed how-to:
Step 1: Find the Dropbox icon on the menu bar of your Mac, which is often located in the upper right corner of the screen. After clicking on the icon, choose Preferences.

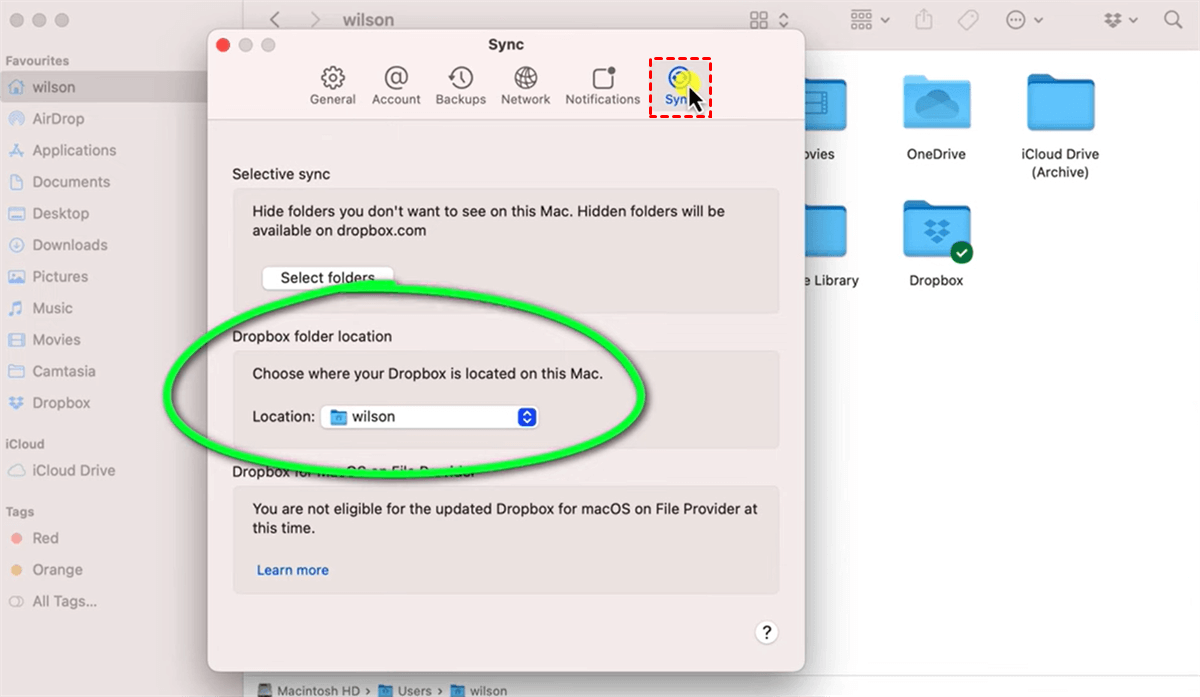
Step 2: Go to the Sync tab in the Dropbox Preferences window. This tab contains options for the file synchronization feature of Dropbox.
Step 3: Find the Show Dropbox in Finder sidebar option under the Sync menu.
Once you follow these steps, Dropbox should appear in the sidebar of your Mac Finder window right away. You may now view your Dropbox files on your Mac just like you would any other folder.
Baically, once you donwload Dropbox on your Mac, the Download folder will be saved on the local path you choose. Then, follow the steps below:
Step 1: Locate the Dropbox folder.
Step 2: Select the folder, the drag and drop it to the side taskbar.
You can also set your Finder show your Dropbox by heading to Finder > Settings.
Then under General, hit the arrow icon to hit Other... > Dropbox. Then hit Choose the confirm the step. After that, Dropbox will show on your Finder immediately.
Even after taking the previously mentioned activities, there may be times when Dropbox does not appear up in your Discoverer sidebar. To get things operating well, try these troubleshooting tips:
Although adding Dropbox to the Finder sidebar makes it easily accessible, you can improve the experience even more by turning on the Dropbox badge in the menu bar. This symbol provides an instant overview of your Dropbox account settings and status. Here's how to make it active:
Step 1: To access Dropbox Preferences, use the same instructions as before (menu bar icon > Preferences).
Step 2: Go to the "General" tab in the Preferences box. This category contains settings pertaining to the Dropbox app's general functionality.
Step 3: Search for the setting that says "Show Dropbox badge in menu bar." Ensure that this option has a checkmark next to it.
Once activated, the menu bar of your Mac will display a new Dropbox icon. When you click on this button, the following menu appears:
You may simplify your productivity and access a world of convenience by integrating Dropbox into your Mac Finder. Eliminate the requirement to switch between apps and halt squandering time looking for records. Your online capacity gets to be an expansion of your neighborhood Mac organizers with Dropbox's consistent integration with Discoverer, making record get to, administration, and sharing basic.
So, take on your duties with the increased productivity that comes from having Dropbox at your fingertips within Finder!


